: Don't Eat the Spatula: whole 30 - Don't Eat The Spatula
Showing posts with label whole 30. Show all posts

Saturday, March 11, 2017

Apple, Cabbage, and Kale Salad (AIP, Paleo, Vegan, Whole 30)


This is a perfectly refreshing salad to break up the "is it winter? is it spring? is it summer?" feeling we have been having the last few weeks. I almost always have these ingredients in my kitchen, so it just made sense to throw them together. It's a perfect salad to pair with almost any meal and is a little more fancy than just a pile of romaine.


Apple, Cabbage, and Kale Salad


Ingredients


  • 1 apple
  • 1/4 of red cabbage
  • 3-4 stalks of kale
  • 1 tablespoon of extra virgin olive oil
  • 1/2 a lemon, juiced
  • A pinch of sea salt

Instructions

  1. Peel and core apple, and slice in to matchsticks. I used a mandolin to get this thin cut.
  2. Slice the red cabbage very thinly. Again, I used my madnolin for a nice uniform thin slice
  3. De-steam kale and discard stems. Chop up leaves and add to bowl. Mix apple, cabbage and kale until well combine.
  4. Add olive oil, lemon juice, and sea salt and stir until well integrated.
  5. You can enjoy this right away, but I will say it gets better as it sits. If you can, make it a few hours or even a day ahead, and it will be even yummier. 


Friday, February 3, 2017

Shrimp and Mushroom Risotto (AIP, Paleo, Whole 30)


Sometimes I wing it and come up with a fun, easy recipe, this was luckily one of those times. This entire meal, from prep to table, will take 30 minutes and one pan (SCORE!). It is also Emily approved, meaning your kids should love it. Well, that is if they are as great an eater as my almost 10 month old. Regardless, this yummy, and totally AIP recipe, has the light fluffy creaminess you would get in a normal risotto. You won't even notice the difference. Ok maybe, but to me, it tasted exactly like it's SAD counterpart.


Shrimp and Mushroom Risotto


Ingredients

  • 2 tablespoon of extra virgin olive oil
  • 1/3 cup of onion, diced
  • 8 oz of mushrooms, sliced
  • 1/2 cup + 1 tablespoon bone broth, divided
  • 4 tablespoons of coconut cream, divided
  • 1 packaged of Trader Joe's Frozen Organic Riced Cauliflower (approximately 3 cups of riced cauliflower)
  • 1 lb of shrimp, deveined and peeled
  • 1 tablespoon cassava flour

Instructions

  1. Heat a large frying pan over medium heat.
  2. When pan is hot, add extra virgin olive oil and let oil warm up for a minute.
  3. Add onions to frying pan and cook for 2-3 minutes or until they become translucent.
  4. Add mushrooms and cook for 5-6 minutes or until the have slightly softened. Stir occasionally.
  5. Stir in 1/2 cup of bone broth and 2 tablespoons of coconut cream and bring to a boil.
  6. Add cauliflower rice, cover, and allow it simmer for 5 mins. Don't worry if the is still in frozen clumps, it will break up on its own.
  7. Stir in shrimp to fully combine. Cover again and let simmer for another 5 minutes.
  8. In a small bowl, whisk together 2 tablespoons of coconut cream, 1 tablespoon of bone broth, and 1 tablespoon of cassava flour.
  9. Stir in coconut cream mix into in cauliflower rice, mushroom, and shrimp saute and allow to cook for another 2-3 minutes on medium heat, or until sauce begins to thicken.
  10. Enjoy!


Tuesday, November 29, 2016

Roasted Pumpkin and Caramelized Apple Soup (AIP, Paleo, Whole 30)


So who still has leftover pumpkin decorations they have no idea what to do with? We were gifted not one, but two cute sugar pumpkins to decorate with and to enjoy. And, if you can believe it, I have never actually cooked with real pumpkin. I have only ever used pureed pumpkin from a can. I knew I could simply roast it like any other winter squash, but since I am on a major soup kick, I wanted to make one that highlighted the naturally sweetness of the pumpkin. The caramelized apples are a nice accent, and bring the yumminess to another level.


Roasted Pumpkin and Caramelized Apple Soup


Ingredients


  • 1 sugar pumpkin (about 2-3 lbs)
  • 1/2 teaspoon sea salt
  • 1/2 tablespoon extra virgin olive oil
  • 2 tablespoons of bacon fat (or fat of choice)
  • 2 medium apples, peeled and sliced
  • 1 teaspoon of cinnamon
  • 2 cups of bone broth

Instructions

  1. Preheat oven to 400 degree F. 
  2. Line a baking sheet with parchment paper or silpat mat.
  3. Slice pumpkin in half and remove seeds and stringy parts.
  4. Lightly season the inside with 1/2 teaspoon sea salt.
  5. Place pumpkin halves on baking sheet, cut side down. 
  6. Brush extra virgin olive oil over the skin of the pumpkin halves.
  7. Roast in preheated oven for 45 min – 1 hour, or until soft. Remove the pumpkin halves and set aside to cool.
  8. While pumpkin is cool, you can cook the apples.
  9. Heat bacon fat in a medium frying pan over medium-high heat.
  10. Once pan is hot, add apple slices to pan and allow to cook for 10-15 mins, or until they are soft and begin to brown. Stir occasionally.
  11. When apples are done, add them plus the flesh from the pumpkin, cinnamon and bone broth to a blender. Mix until smooth and fully combined.
  12. The pumpkin should still be hot enough to warm the bone broth, but if the soup is not warm enough, simply heat in a pot over medium-low heat on stove.
  13. Enjoy.


Sunday, August 14, 2016

Creamy Mushroom Soup (AIP, Coconut Free, Paleo, Whole 30)


I am a sucker for a big bowl of creamy goodness of the mushroom variety. Prior to my paleo/AIP days, I would go around testing all the the mushroom soups I could find. The richness of the cream, the earthiness of the mushrooms, it was on of my favorite flavor combo. Of course, since cream is a no go for me now, I had kind of written off attempting to make this soup. I have attempted only one recipes thus far, and while it was pretty tasty, it never quite seemed to work for me. Since most recipes use coconut cream for the creamy texture, it is sometimes hard to avoid the coconut flavor taking over a dish. Sometimes it works really well, but for mushroom soup, I found it to be too overpowering.

Enter: the cauliflower. One of my favorite soups to keep in the house is a this Creamy Cauliflower Leek soup by Paleogirl99. She uses the blended cauliflower to give the soup it's creamy texture. So, I figured, hey I wonder if using cauliflower would help give the creaminess to the mushroom soup, without taking over the flavor? And guess what, it worked! This soup is perfect blend of earthy creamy goodness, that will definitely satisfy your taste buds.

(and only more creamy for good measure)


Creamy Mushroom Soup


Ingredients

  • 2 tablespoons extra virgin olive oil
  • ½ cup shallots, sliced
  • 2 tablespoons garlic, sliced
  • 1 lb white buttom mushrooms, sliced
  • 2 cups cauliflower florets, fresh or frozen
  • ½ cups bone broth, divided
  • 1 teaspoon dried tarragon
  • 1 teaspoon dried thyme
  • ½ teaspoon sea salt

Instructions

  1. Set instant pot to saute and extra virgin olive oil to the pot.
  2. Once oil is hot, add shallots and garlic slices and cook for 2 minutes. Stir occasionally.
  3. Add mushrooms and allow them to cook down for 5 minutes or until the have reduced by about half. Stir frequently.
  4. Cancel saute function and pour in half a cup of bone broth. Deglaze the pan and scrap up all the dark bits from the bottom. 
  5. Add in the remaining broth, cauliflower florets, dried tarragon, thyme, and sea salt. Stir to combine.
  6. Place lid on pot and be sure the valve is set to sealing.
  7. Use the manual setting on high pressure and adjust the time to 10 minutes.
  8. When it is complete, press cancel and open the valve to manually release the pressure.
  9. Use an immersion blender to fulling blend all ingredients together.
  10. Enjoy!


Monday, July 11, 2016

Quick Pickled Radicchio, Radish, and Apple (AIP, Paleo, Whole 30, Vegan)


For the recently holiday weekend, Emily and I packed up my car (to the max) and ventured up to visit my parents for the week. They live about 2 hours away and we don't get to see them too often, so we decided to make it a nice long visit. One of my favorite things to do while home is shop at all the amazing discount grocery stores. They have nothing like them where I live, so I always stock up when I am in town.

On our last day there, we stopped in at this place called Ebenzer's Groceris. It has this huge freezer full of fresh produce, half traditional and half organic. The best part is the prices. I left with at least 5 bags of fresh produce for under $40. One item I picked up was two pretty decent size heads of organic radicchio, which were two for $1!!! Since this is something I don't normally buy for us, I wasn't sure what I would do with it, besides add it to a salad.

Then, the other night, after I pulled it out and stared at the radicchio for a while, I said to the hubby, "I want to make something with this, but I have no idea what." To which my brilliant hubby said, "why don't you pickle it?" And that was it, I knew exactly what to do. Thus the quick pickled radicchio, radish, and apple recipe was conceived.


Quick Pickled Radicchio, Radish, and Apple 


Ingredients


  • 2 cups radicchio, shredded
  • 1/2 teaspoon sea salt
  • 1 cup, red radish, cut in to matchsticks
  • 1 apple, chopped
  • 2 tablespoons apple cider vinegar

Instructions

  1. Add shredded radicchio to a medium bowl and sprinkle sea salt all over and let sit for 2 minutes.
  2. Stir radicchio up and then add in remaining ingredients
  3. Serve immediately or refrigerate up to 3 days to enjoy later. 


Friday, March 18, 2016

Semi-Sweet Plantain Fritters (AIP, Low-FOMAP, Paleo, Vegan, Whole 30)


Plantains have become one of my favorite starches since going AIP. Just a year ago, I didn't even know what a plantain was, much less what in the world what to do with it. Then I made tostones, and my world was forever changed. I tend to mostly use green plantains and never quite sure what to do with then start to tern yellow.

Usually I just slice and fry them up (which is delicious), but the other day I decided to try something new. I had a few plantains that were just yellow and turning a little soft. There are just becoming sweet, but still have a good bit of starchiness in them that helps them become perfect fritters.


Semi-Sweet Plantain Fritters

Makes 2-3 servings

Ingredients

  • 1 yellow plantain
  • ½ tablespoons cold water
  • 1 tablespoon cassava flour 
  • ¼ teaspoon ground cinnamon
  • A pinch of fine sea salt
  • 1 tablespoon avocado oil

Instructions

  1. Peel plantain and cut in large chunks. Add to food processor and do 2-second pulses (about 2-3) until it is finely chopped up, but not pureed.
  2. Add chopped plantain to small bowl and mix in water, cassava flour, cinnamon, and sea salt.
  3. Heat a medium pan over medium/low heat. You want it to be warm enough to heat the oil, but not too hot or they will stick.
  4. When pan is hot, add oil to warm.
  5. Fill a 1/4 cup with plantain mix and use that to put mix in pan. I found when I tapped the edge of the pan with the cup handle, it plopped right into a nice patty. Lightly press it down with a spatula to shape.
  6. Allow to cook undisturbed for about 2 minutes. 
  7. Carefully slide spatula under the fritter, if it is sticking, give it another minute. If it is ready, flip it over and cook it for another 2 minutes.
  8. Remove from pan and enjoy.


Wednesday, March 2, 2016

Lemon Dill Baked Salmon (AIP, Low-FODMAP, Paleo, Whole 30)


It may surprise some, but I have eaten a lot of fish throughout my pregnancy. I have easily had 2-3 servings a week of either salmon, sardines, anchovies, cod, or something similar. There is an old notion that consuming seafood while pregnant is a big no-no, but that is simply not true. Think about it, in many cultures around the world, seafood makes up a large portion of people's diets, and I guarantee they do not reduce their consumption while pregnant or breastfeeding.

While there are some concerns regarding the mercury in fish, there are actually far more beneficial nutrients that come from fish that outweigh the minimal levels of mercury actually present.There are two great pieces that go into the health benefits and importance of consuming fish both for everyone, and for pregnant women.

The first pice by Chris Kresser states "Based on the new understanding of selenium’s protective role, and the importance of DHA for fetal and early childhood development, pregnant mothers should be advised to eat oily ocean fish regularly." Read more about on what Chris has to say regarding eating fish here.

Additionally, Sarah Ballantyne, goes on to say something very similar " Not only is the mercury exposure from seafood a complete non-issue (with the exceptions of the few fish that are higher in mercury than selenium), but by limiting seafood during pregnancy, women are missing out on the best food source of DHA, an extremely essential nutrient for their health and the health of their growing baby.  In fact, a maternal diet rich in DHA has been shown to improve a baby’s IQ by 10 points.  The recommendation should probably be for a minimum of three 6oz servings of oily cold-water fish per week for these women, if not a diet that is heavily based on fish as a protein source (although, there still is a legitimate rationale for avoiding sushi)." Read more about what she has to to say about the importance of fish our diets here.

Since fish is not something you should avoid, but something you should actually include weekly in your meal plan, I am sharing my most favorite and super easy salmon recipe with you all.


Lemon Dill Baked Salmon


Ingredients

  • 1 lb wild caught salmon, deboned
  • 1 tablespoon extra virgin olive oil
  • 1 lemon, thinly sliced
  • 2 tablespoons fresh dill, chopped and divided

Instructions

  1. Preheat oven to 400 degrees F.
  2. Rinse salmon, pat dry, and place salmon on a parchment paper lined baking sheet.
  3. Brush olive oil all over the top of the salmon.
  4. Sprinkle half dill over the salmon. Layer the lemon slices over the salmon. Sprinkle remaining dill over the salmon.
  5. Bake in oven for 20 minutes or until salmon is cook (flaky).
  6. Remove from oven and let cool for 2-3 minutes. Cut in to portions and enjoy with your favorite sides. Personally, I love this salmon with simple roasted asparagus and cauliflower rice.


Monday, February 22, 2016

Warm Escarole, Pineapple, and Toasted Coconut Salad (AIP, Paleo, Vegan, Whole 30)


Vegetables. Give me all the vegetables! Since starting the autoimmune protocol, I have found myself trying out so many new veggies. Some I never even heard of just a few years ago, others I have known about, but was always to scared to try them. Are you trying new vegetables now that you have changed your diet?

If not, or even if you are, I have a tip for you. If you are fortunate enough to have an international market near, like an Asian market, I recommend you go there. Even if you don't have one, go to your local grocery store. Each week, pick one new vegetable you have never tried before and give it a go.

This week I tried escarole for the first time. I learned, through trusted Google, escarole is a form of endive. It's got broad leaves and a bitter flavor. Basically the perfect match for a sweet crunchy warm salad. As I do with almost any other recipe on the blog, I checked the fridge to see what I could mix with it. This warm salad is a perfect way to get in your greens, but in a bit of a nontraditional way.


Warm Escarole, Pineapple, and Toasted Coconut Salad


Ingredients

  • 1/4 cup shredded coconut
  • 1/3 cup finely diced pineapple, reserve 1 tablespoon of juice
  • 4 cups, chopped escarole, approximately one small head
  • 2 teaspoons extra virgin olive oil
  • 2 teaspoons balsamic vinegar
  • A pinch of sea salt

Instructions

  1. Warm a large frying pan over medium/low heat.
  2. Once pan is warm, add the shredded coconut to the pan. Leave alone for 3-4 minutes, or until it begins to brown. Toss and cook for another minute.
  3. Add pineapple to pan and toss with shredded coconut and cook for about two minutes.
  4. Add escarole and extra virgin olive oil to frying pan and toss to combine.
  5. Stir often and allow to cook for 2 minutes, just enough to combine everything and warm up the escarole, but not enough to wilt it.
  6. Remove from heat and place in a mixing bowl.
  7. Add in reserved pineapple juice, balsamic vinegar, and sea salt. Toss to combine.
  8. Serve as a side to your favorite meal.


Thursday, January 7, 2016

Seafood Chowder (AIP, Paleo, Whole 30)


There is nothing more comforting than a big bowl of seafood chowder. There are a lot of fantastic recipes out there for AIP chowder, and I highly recommend you check them out too. This was simply my version, based on what goodies I found in my kitchen. I tend to prefer a not so thick chowder, but you might. If you would like to make this a little more thick, I recommend reserving some of the cooked potatoes and blend them separately, then add them back to the chowder.


Seafood Chowder


Ingredients

  • 4 tablespoons lard
  • 2 tablespoons extra virgin olive oil
  • 2 shallots, sliced
  • 1 large carrot, diced
  • 3 celery stalks, chopped
  • 4 oz mushrooms, sliced
  • 1/2 cup white wine*
  • 1 medium white sweet potato, diced
  • 2 cubs bone broth
  • 1 can coconut milk
  • 1 teaspoon dried parsley
  • 1 teaspoon dried dill
  • 1 teaspoons dried basil
  • 1/2 teaspoon sea salt
  • 1 tablespoon cassava flour + 1 tablespoon of water, whisked together
  • 1.5 mixed raw seafood, I used 1 lb of shrimp and 8oz of mussel meat

*use bone broth instead of white wine for Whole30 compliance.

Instructions

  1. In a large stock pot, heat oil and lard over medium heat.
  2. Once oil is warm, add shallots and cook for 2 minutes.
  3. Add carrots, celery, and mushrooms and cook for another 4 minutes.
  4. Pour in white wine, and let cook for about 3 minutes, until it starts to reduce.
  5. Now add  sweet potatoes, bone broth, coconut milk, and herbs to pot. Allow to simmer for 20 minutes to allow flavors come together and potatoes to cook.
  6. Whisk in cassava flour/water mix.
  7. Add seafood to pot and cook for about 10-15 minutes, or until it is cooked.
  8. Serve and enjoy.


Wednesday, December 9, 2015

Wilted Kale with Shallots (AIP, Paleo, Vegan, Whole 30)


My absolute favorite leafy green has to be kale. However, up until about a year or so ago, I REFUSED to eat kale. The taste was so not appealing to me and I wanted nothing to do with it. Then I tried it for the first time raw, in a salad, and decided it wasn't too bad. Then I discovered wilted kale and my love affair officially began.

This is definitely one of my favorite ways to have kale as a side dish. The dish takes less than 5 minutes to cook. I am pretty sure the prep of the kale takes longer than the cook time.


Wilted Kale with Shallots


Ingredients

  • 1 small bunch of kale, de-stemmed and roughly chopped (approximately 3 cups chopped)
  • 1 large shallot, thinly sliced (approximately 1 cup sliced)
  • 2 tablespoons avocado oil, divided
  • ½ teaspoon Himalayan sea salt

Instructions

  1. In a large frying pan, warm 1 tablespoon of olive oil over medium heat.
  2. Once oil is hot, add shallots and cook for 2 minutes or until they start to turn translucent. Stir frequently.
  3. Add kale, salt, and remaining sea salt to pan. Stir until kale is completely coated with oil. Cook for 1 minute, or until kale just changes to bright green color. Stir frequently.
  4. Serve and enjoy with your favorite meal. Makes about 3-4 servings


Wednesday, November 11, 2015

Easy Healing Chicken and Vegetable Soup (AIP, Paleo. Whole 30)


Tell me this is not a familiar situation for you: you come home from work to sick child or spouse or even you are getting the sniffles. The fancy dinner you had planned for this evening is not going to work now. You have nothing else defrosted and ready to go, but you know you have to make something for the family. More importantly, you want to stop this cold/flu before it takes down the whole family.

This was the situation I found myself in yesterday. Enter my favorite kitchen gadget ever: Instant Pot. I absolutely love that you can just throw everything in it and not worry about defrosting things. You just turn it on, and walk away. Then, like magic, you have the most delicious meal ever and barely did a thing to make it.

This soup took only about 5 minutes to prep and about 45 minutes to cook (counting in pressure and depressurize times). Who doesn't want a big bowl of chicken soup when they aren't feeling so great? Plus, with homemade bone broth, ginger, and turmeric, this soup is ready to battle that cold away. I am unofficially calling it my "Get Better Soon Soup!"


Easy Healing Chicken and Vegetable Soup 

{aka Get Better Soon Soup}


Ingredients


  • 1 lb frozen chicken thighs
  • 3-4 carrots, peeled and chopped or sliced (your preference)
  • 3 celery sticks, diced
  • 2 shallots or ½ a medium onion, finely diced
  • 3 cloves of garlic, chopped
  • 1 sweet potato, peeled, and diced
  • 4 cups of bone broth
  • 1 teaspoon sea salt
  • 1 teaspoon ground ginger
  • 1 teaspoon ground turmeric

Instructions

  1. Add all ingredients to Instant Pot.
  2. Close lid and make sure it is sealed. Using manual, set for 25 minutes.
  3. When done turn off Instant Pot and either let the pressure release naturally, or if you are hungry manually release pressure.
  4. Remove chicken thighs, and shred with forks. Once shredded, and back to pot and stir to combine.
  5. Serve, enjoy and kick that cold to the curb! 
Makes 4-6 servings


Sunday, November 1, 2015

Kabocha Tots (AIP, Paleo, Whole 30, Vegan)


Kabocha squash has quickly become one of my most favorite squash. I only recently discovered it since going AIP, and wasn't entire sure what to do with it. Roasting tastes great, but I found they could hold up their structure well enough to become yummy tater tot like side.


Ingredients

  • 1 medium kabocha squash
  • 1 teaspoon garlic powder
  • ½ teaspoon ground ginger
  • ½ teaspoon savory
  • ¼ teaspoon cinnamon
  • ¼ teaspoon sea salt
  • 1 tablespoon avocado oil

Instructions

    1. Preheat oven to 425 degree F.
    2. Wash the squash, then cut in half and deseed. You can leave the skin on or cut it off, it is based on your preference.
    3. Cut squash into small, bite-size pieces and to a medium size bowl
    4. In a small bowl combine garlic powder, ground ginger, savory, cinnamon, and sea salt.
    5. Sprinkle seasoning blend and avocado oil over kabocha tots and stir to completely coat.
    6. Pour seasoned tots on to a parchment paper lined backing sheet.
    7. Put tots in preheated over for 25 minutes, toss them half way through cooking.
    8. Remove, let cool for minute, then serve and enjoy!


    Tuesday, September 29, 2015

    Guest Post: My Whole 30 Experience

    I am beyond excited to share this guest post from someone so incredibly special to me: my mom. Recently, she finished her very first Whole 30. As someone who has been supportive of me in all I do, I am beyond proud of her. I asked her if she could share her experience with you all. Without further ado, ladies and gentlemen, my mom. P.S. please feel free to ignore the amount of non-food related pictures of my mom and me, I just love her to pieces. :-)


    I was never planning on doing Whole 30, ever!  I do not like to deprive myself and I was quite happy eating whatever I wanted, thank you very much.  Of course I was overweight and struggling with an autoimmune disease, but still was not motivated enough to try and change my eating habits.  I bit of history.  In my first year of marriage I put on 50 lbs without hardly even noticing it!  I struggled to try and loose weight over the next five years, but nothing I tried ever worked. Then I had my first daughter and put on a few more pounds.  Five years later, I had my second daughter, and even though I hardly put on any weight during that pregnancy, I put on more weight after she was born.  For the next 20 years while raising my girls, I just could NOT loose weight no matter what I tried!  So by the time I was diagnosed with RA in my early 50’s I just thought - I am in pain daily, I am going to eat whatever I want!  And I did.

    When my oldest daughter was diagnosed with PCOS in her 20’s I realized that I had all of the same symptoms. By this time, I had had a complete hysterectomy and was trying to deal with all the fun things that go along with that!  Hello hot flashes, weight gain and chocolate cravings!!

    So where does Whole 30 come in?  My oldest daughter had started cooking AIP and I thought she was crazy!!  Giving up all those foods, cooking everything from scratch, so.much.work. I encouraged her from a distance, but that was NOT for me!  Then my youngest daughter discovered that she had a gluten intolerance, and when she cut it out of her diet along with sugar, she saw a huge improvement.  So with both of girls seeing so much success by trying an elimination type diet, I started wondering if I could be helped by doing the same thing.

    Well, that is when the research started! My family knows that I am the queen of research, and until I have checked out EVERY possible option, I cannot start anything.  I knew I did not want to do AIP, and that is when I found whole30.com  At first it looked daunting, but then I
    found the wonderful website of Mellisa Joulwan and her cook books Well Fed and Well Fed 2. Between these two websites I gathered a wealth of information and all my questions were answered. On Mellisa’s site she has a very helpful shopping list and prep list that I followed, and it  REALLY took the guess work of how to get started.

    So, now that I was armed with all my information and research, I had to convince my husband, that for the next 30 days we would not be eating any sugar, dairy, grains, legumes, soy and alcohol!  I decided to  used two strategies. 1. I eased into it, and  2. I didn’t tell him!  The week before we started Whole 30, was vacation time for us.  We had planned a week long “Staycation” and this is when I tested some of Mellisa’s great recipes.  I just presented them to my husband as “new” recipes I was trying.  He loved them.  We both loved them.  That was the moment I thought to myself, “I think I can do this, at least for 30 days”

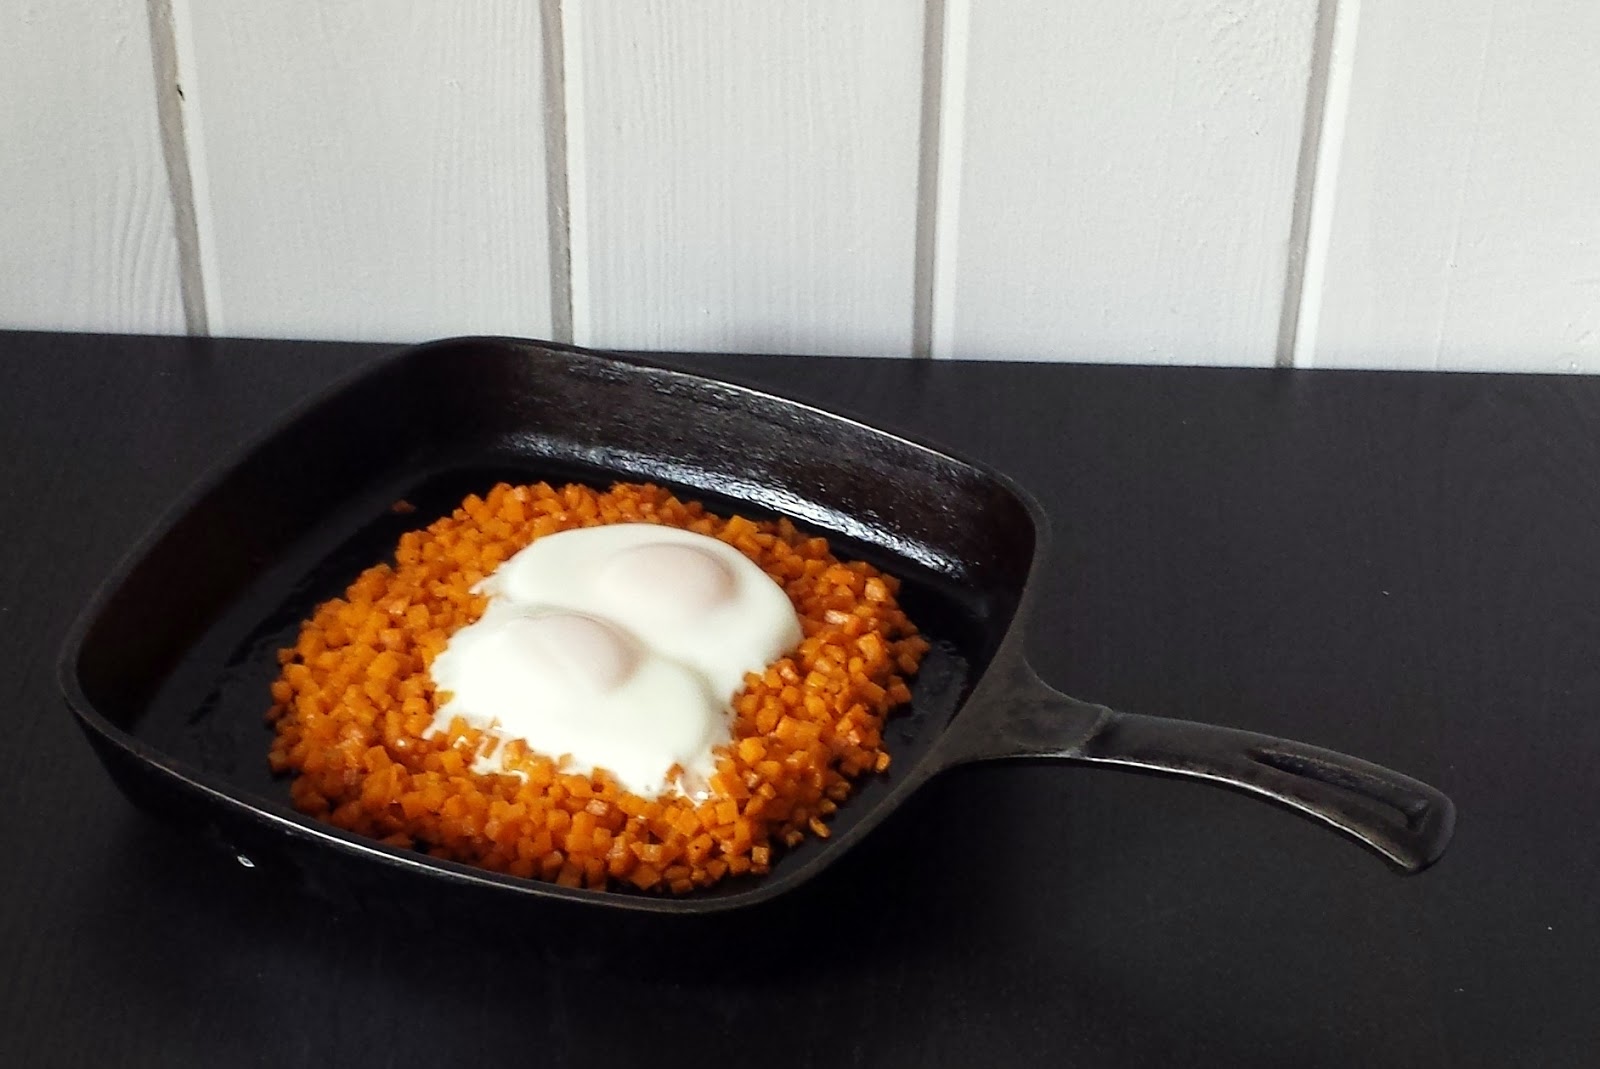
    One of the things that the Whole 30 recommends is that you take a week or so to prepare yourself and your kitchen for the start of your 30 day reset.  This was the best advice.  I stocked up on meat and veggies and eggs.  Oh, the amount of eggs we went through was truly astounding!  The other thing I did, was buy a nice insulated lunch box for my husband.  After all he was going to be carrying a full lunch with him everyday to work, and if I went to the all trouble to prepare it for him, I wanted it to stay cool and edible! This worked like and charm, and every evening I would package up leftovers into containers and stack them in the fridge for the night and then throw them into his lunch box in the morning along with some cut up veggies and some fruit.  I also got up and made him a simple breakfast of eggs, sausage and fruit EVERY MORNING, knowing that if I did not do this, he would eat nothing at all as he has done for years!  So, yes there was a lot of cooking and prep to do, but I did batch cooking on Sundays and that made things SO much easier.    It’s one thing to have  all the ingredients for a recipe in your fridge and cupboards, but it is a WHOLE ‘nother thing when the actual meal is cooked and sitting there in your fridge ready to just pull out and heat up!

    The first week was a little rough, especially for my husband because he was missing his coffee and tea, badly.  Coffee and tea is allowed on Whole 30, but with no sugar or creamer.  According to my husband, tea or coffee without sugar or cream is just NOT worth having, so we just gave them up altogether.  I drank some herbal mint teas and I made mint iced tea with mint from my garden.  I would say that by keeping our menus varied and interesting, with a lot of new recipes, we did well through the first two weeks.  We felt more energetic, and I definitely felt much lighter.  That is the wonderful thing.  I was eating a lot of food at every meal, but I never ever felt stuffed.  By week three and four we were in a rhythm and were not even craving sweet things anymore.  I had successfully eaten out with a friend twice and stayed on track.  It felt really good.

    When the end of the 30 days rolled around, we weighed ourselves.  Astonishingly, we had both lost about 15 pounds!  That was the most weight I had EVER lost on any program, any time!  We were thrilled, and without even saying anything out loud, we just decided to keep on eating this way!  I have introduced a few things back into our diets. I have added back a little honey or maple syrup into my homemade salad dressing and we are eating a little bacon now and then.   We are still grain free, but I am starting to experiment with some alternative flours for baking.  We love the way we feel and probably will continue to eat this way for now.  We are both hoping to loose some more weight, and I think the way we will achieve that, is to cut back a little on the fruit and up the veggies!

    For me this has really been a revelation.  Never in a million years did I think I could stick to this for 30 days!  Also, I never believed that my cravings for sweets and chocolates and bread could just disappear, but they did. Some other “non scale victories” as they are called in the Whole30 program, better sleep and  more energy.  I even took a short hike with my youngest daughter in the woods!  What!  My husband and I now try and go on more walks around the neighborhood. He even dug his bicycle out of the shed and goes for short rides on the weekends.  My advice if you are thinking about doing Whole 30, is,  do your research, find support (there are a LOT of Blogs and Instagram) have a plan and then, JUST DO IT!  It’s only 30 days!

    Saturday, September 12, 2015

    Carrot, Parsnip, & Collard Green Ribbons (AIP, Low-FODMAP, Paleo, Whole 30)


    I am all about the veggies right now it seems. Which is probably a good thing, because vegetables should be 2/3 of your plate for each meal. Just take a look at this AIP Food Pyramid by Phoenix Helix. You should be consume 6-14 cups vegetables per day. To make that possible, the 2/3 rule of thumb will help you accomplish this goal.


    Carrot, Parsnip, & Collard Green Ribbons 


    Ingredients 

    • 2 medium carrots
    • 1 medium parsnip
    • 6-7 collard green leaves
    • 1 tablespoon extra virgin olive oil
    • 1 teaspoon sea salt
    • ½ cup bone broth

    Instructions

    1. Wash the carrots and parsnips and then peel off the skin and discard, unless organic, then you can use the skin. Using a vegetable peeler. Continue to peel the carrots and parsnip to create ribbons.
    2. Rinse of collard green leaves and cut out ribs. Fold leaves in half lengthwise, and slice horizontally in ½ inch strips.
    3. In a large frying pan, heat olive oil over medium high heat.
    4. When plan is hot, add in carrots and parsnips and toss to combine and coat in oil. Cook for 5 minutes, stirring often.
    5. Add in collard greens and cook for another 2-3 minutes. or until the greens change to a brighter green color. Toss in the sea salt and stir to combine.
    6. Pour in bone broth. Bring to a boil, then turn down to a simmer. Cover and cook at a simmer for 10 minutes.
    7. Remove lid, toss and let cook for another 2-3 minutes, or until liquid has been soaked up.
    8. Enjoy!


    Wednesday, September 2, 2015

    Carrot Diakon Mint Risotto (AIP, Low-FODMAP, Paleo, Whole 30)


    This risotto brings in some new rice options for those who can't have or don't like cauliflower rice. The mint adds a nice fresh element as well. Plus it is fun to use ingredients like, diakon radish, in ways you never thought to.


    Carrot Diakon Mint Risotto


    Ingredients


    • 3 medium carrots, peeled and rough chopped
    • 1 ½ cups peeled, diced diakon
    • 2 tablespoons of extra virgin olive oil
    • 1 cup chopped bone broth
    • 1 teaspoon sea salt
    • ¼ cup finely chopped  fresh mint
    • 1 tablespoon chopped fresh lavender

    Instructions


    1. Add carrots and diakon to food processor and blend in short bursts, about 2 seconds at a time until it is fully riced.
    2. In a large pan, heat olive oil over medium high heat.
    3. Add riced carrots and diakon to pan and cook for 5 mins.
    4. Pour in bone broth, sea salt, mint and lavender to pan and stir to combine.
    5. Turn down heat and simmer in uncovered pan for 20 minutes. Most of the liquid should absorbed. 
    6. Serve and enjoy!


    Sunday, August 16, 2015

    Yuca con Mojo {Cassava with Garlic Sauce} (AIP, Paleo, Vegan, Whole 30)


    Long before I discovered the Yuca Slayer, Jennifer Robins from Predominantly Paleo, I remember buying my first yuca (cassava) root because it intrigued me. Having no idea what to do with it, I did what I always do when at a loss with a new ingredient, I googled it. The one recipe that stuck out to me was yuca con mojo, aka yuca (cassava) with garlic sauce.

    After trying many different variations of this recipe and making a few tweaks of my own, I found a recipe I truly loved. It is a traditional Cuban recipe that uses yuca (cassava) root, lime, garlic, and olive oil. However, my personal taste buds didn't care for the lime, so I have chosen lemon for my recipe, steering it a little from tradition. I make this recipe pretty often and love to eat it as side with anything really, but I really enjoy it with chicken and big pile of kale.


    Yuca con mojo {Cassava with garlic sauce} 


    Ingredients

    • 1 lb yuca (cassava root) fresh or frozen
    • 1 teaspoon sea salt, divided
    • 1½ teaspoons plus + ¼ cup of fresh squeezed lemon juice
    • 3 tablespoons of minced garlic
    • ½ garlic cup sliced red onion
    • ¼ cup extra virgin olive oil

    Instructions

    1. Prepare yuca
      1. If using fresh yuca, cut of each end, and cut in thirds. Then, cut off the outside peel. Once peel is removed, cut up into bite size pieces. 
      2. If frozen, let sit out for a few minutes until you can cut it down into bite size pieces.
    2. Add cut yuca onto a medium size pot and add enough water to cover it. Add in ½ teaspoon of sea salt and 1½ teaspoons of lemon juice.
    3. Bring yuca to a boil, reduce to a simmer, cover, and cook for 25 mins (or until yuca is tender but not mushy)
    4. Combine garlic and ½ teaspoon of sea salt in a small dish
    5. When yuca is done, drain, and sift through to remove hard center core. Even the frozen sometimes has a little left over. Set aside.
    6. Return saucepan to stove top and set to medium high heat. Add red onion, olive oil, ¼ cup lemon juice, and garlic salt mix to sauce pan. Cook for 5 minutes.
    7. Lastly, add yuca to the saucepan and cook for another 5 minutes.
    8. Serve and Enjoy!


    Thursday, August 6, 2015

    Stuffed Pattypan Squash (AIP, Low-FODMAP, Paleo, SCD, Whole 30)


    Recently, I met my first pattypan squash. They were so cute and look like little pumpkins, what is there not to like about them? When I picked these up the other day at my local farm stand, I immediately knew I would stuff them. The question was, with what?

    Through my research online, I found most recipes used rice as a main ingredient in the stuffing. Of course this wouldn't work, so I had to get creative. On top of that, I couldn't use cauli-rice again, because the hubby said he won't eat it anymore (whatever, I could eat it every day, but to each their own). So what to rice? After looking through what I had in the kitchen, I settled on diakon radish because it basically my new favorite snack. I am super excited how well these turned out, and even the hubby approved!


    Stuffed Pattypan Squash


    Ingredients


    • 8 small pattypan squash
    • 2 tablespoons extra virgin olive oil, divided
    • 1 lb grassfed ground beef
    • 2 cups diakon radish, cubed
    • 3/4 cup bone broth
    • ½ teaspoon sea salt
    • 1 cup frozen spinach

    Instructions

    1. Preheat oven to 400 degrees F and place cooking sheet in oven to heat as it comes to temperature.
    2. Wash and dry squash, and slice the top off about a ½ inch from stem. Level out the bottom of the squash by cutting of a little so it sits flat.
    3. Scoop out the squash seeds and flesh, leave about a ½ inch shell. Reserve the flesh. 
    4. Lightly coat the cut parts of the squash with 1 tablespoon extra virgin olive oil.
    5. Remove cooking sheet from oven and place squash on the sheet, opening side down.
    6. Roast for about 15 mins or until it is tender and the flesh side is brown.
    7. While the squash heat 1 tablespoon of extra virgin olive oil over medium high heat in a large frying pan.
    8. Once pan is hot, add ground beef and brown.
    9. While meat is browning, place cubed radish and squash flesh in a food processor or blender, and pulse in 2 second intervals until it is riced. About 5 times.
    10. When beef is browned, add in the riced radish and squash flesh and bone broth. 
    11. Bring to boil and let simmer for 5 mins or until most of liquid is gone.
    12. Add spinach and sea salt and stir to combine. Cook for another 5 mins over medium heat.
    13. Remove from heat when done
    14. When squash is cooked, remove from oven and flip them over so opening is face up.
    15. Spoon stuffing mixture evenly into the squash rounds. 
    16. Serve and enjoy!


    Thursday, July 16, 2015

    Easy Braised Cabbage (AIP, Paleo, Whole 30)


    Recently, I had the pleasure of guest posting on for Leslie of the The Whole Life Balance. She is a an amazing blogger who shares how to find the balance between life, health, and so much more. In fact, Leslie did a fantastic guest post on Don't Eat the Spatula covering my most favorite topic, Meal Planning. If you haven't read it yet, I highly recommend doing so now!

    The recipe I shared on her site is a very simple way to make cabbage that can be cooked up at the beginning of the week and used as leftovers with almost any dish. I usually make a batch of this every week to have it as an easy side. Click here to view the recipe.

    Wednesday, November 27, 2013

    Sweet Potato Hash (AIP, Paleo, Vegan, Whole 30)

    Secret's Out


    I am going to share a very special secret with you. It is how I keep myself sane among all of life’s business – I plan. Yes, I know this concept sounds simple, but think just about it for a moment.
    Owen is demonstrating what you can do more of when you plan.
    When was the last time you planned your entire week of meals out: breakfast, lunch, and dinner? Think what happens when you don’t have your food figured out? You grab a granola bar for breakfast. You head to the sandwich shop down the street where everyone knows your name and has your order ready when you walk in. Then of course there is the Chinese takeout guy who stops by one too many times a month. 

    Now imagine if you took the time on Sunday and figured it all out. No time spent during the week having to come up with something dinner, and then just giving up and ordering take out anyway. Or while consuming your lunch thinking, I wonder what is actually in this McDouble? 

    This is why I plan - to remove the temptations, to make things simple (yes simple) and to have control over what I am eating. I promise to make many more posts about planned meals and snacks I use, but for day I am going to share one of my favorites.

    Awesomeness aka Sweet Potato Hash


    If you remember anything about your favorite breakfast from your child it would be going to a diner and ordering sunny-side-up eggs with toast and potato hash. Ok maybe this was just my childhood. I loved potato hash! There is just something so breakfast about it. However, I knew that I needed to find an alternative healthier option. 

    Sweet Potato


    Can someone explain to me why we never ate enough of this as kids? Sweet potatoes rock my socks and are just so versatile. Breakfast, snack, lunch, dinner, and dessert can be made with sweet potatoes. I promise I have many more recipes to share. The best part about this recipe is, with a little prep on Sunday, you will have breakfast for each morning that will only take 10 minutes to make. No excuse!

    Ingredients


    • 1 sweet potato, peeled and shredded
    • 1 small onion, finely diced
    • Sea salt and pepper (omit for AIP) to taste


    Prepare ahead

    Prep the sweet potato and onion up to 5 days ahead of time and store in a sealed container or bag in fridge.

    Dice up the onion and place both in ziplock bags to easily grab in the morning.

    Instructions

    1. Heat 1 tablespoon of coconut oil in a medium frying pan over medium heat.
    2. Once the oil is warm, add in about half a cup of the shredded sweet potato and 1/4 cup handful of onions to pan. 
    3. Season the mix with a little salt and pepper (omit for AIP). It will take about 5 to 10 minutes to cook, just remember to stir it often because it can easily burn. 
    4. Enjoy with your other favorite breakfast items.


    And that is it! It is so simple and so delicious. Sometimes I add tomatoes and garlic to my hash. It really depends on what's in the kitchen. No more excuses! Pre-plan your breakfasts next week and let me know how it goes!