: Don't Eat the Spatula: glutenfree - Don't Eat The Spatula
Showing posts with label glutenfree. Show all posts

Thursday, April 20, 2017

Single Serving Chocolate Birthday Cake + A Special Giveaway (AIP, Paleo, Vegan)


A Year in the Life


This past weekend, we celebrated a very special moment. One year ago we met our beautiful little girl for the very first time. We brought her home to our house and introduced her to her three fur siblings and then thought, now what? LOL. Let's face it, no one knows what the heck they are doing as first time parents. It's nerve wrecking, and terrifying and wonderful all at the same time. As each month passed, my husband would say to me, "well we made it one more month." We all still had our fingers and toes and everyone, for the most part, was doing well. Those first few months felt like years of time as the passed. All the time and energy I spent trying to have a beautiful breastfeeding relationship with Emily now seems so distant and a drop of water in the ocean (read about our journey here).

Then in a blink, it was time to let Emily enjoy all my favorite foods as we began baby-led weaning. No surprise at all, she was a natural foodie baby and loved everything I gave her. If you don't already, follow me on Instagram where I often share pictures of what she is having each day. Right around 6 months, was the moment I am sure the world started spinning faster and time sped up because the next thing I knew, it was less than two months until her first birthday and it was time to plan to celebrate a whole year of her life.


To Smash Cake or to Not Smash Cake?


I must be honest, I was not even originally planning on having a smash cake for Emily's birthday. I just didn't see all the hype, and since she is such a fantastic eater, I didn't expect there to be any smashing. BUT after attending a few of her friends first birthdays I couldn't help myself. I wanted her to experience that as well, and then one day we can look back at those pictures and I can share the whole crazy day with her.

When I finally decided to have a birthday cake for Emily, I knew two things right away.

  1. I will be making it from scratch.
  2. It will use my most favorite flour ever, Otto's Cassava Flour.

Recently, I shared this AIP Chocolate Mug Cake recipe which was in inspiration for the cake. I decided to remove the sweeteners from the cake and add applesauce. This required a little adjusting of the other ingredients. For the frosting, while I knew a simple coconut cream frosting would work just fine, I really wanted something that was more frosting like in texture. While Emily does not eat strict AIP (she does eat eggs and many other paleo foods), I decided to keep this as an AIP cake so that I could use it for other occasions.

I have tested this recipe three times now and Emily has had it twice. I can say for certain it's a winner for both mommy and baby. What I also love about this cake (having tested it so much) is that both the cake and frosting can easily be separately  made ahead and assembled wherever you need them. Or you can make then entire cake ahead, freeze it, and travel to your destination. For Emily's birthday, I made the cake and frosting two days before the party and kept them in the fridge. Then the day before, I put the cake together and froze it and drove to my parents house (2 hours away) and it kept in their fridge until the party the next day. It turned out perfect!

Emily's Birthday Giveaway

Not only am I sharing this delicious birthday cake recipe with you all, but Otto's Cassava Flour has so graciously agreed to giveaway a 5 lb bag of cassava flour to help celebrate Emily's birthday. To enter for a chance to win a bag of cassava flour comment below who you plan to make this birthday cake recipe for next! The winner will be chosen on Sunday, April 23 at 12:00 pm EST. (for U.S. participates only). This giveaway is over. Congratulations, Rebecca Nicodemus for winning a bag of Otto's Cassava Flout. Thank you for all those who entered.


Single Serving Chocolate Birthday Cake


Ingredients


Cake:
Frosting:
Option: fruit juice or vegetable juice to color frosting


Instructions
  1. Preheat oven to 350 degrees F. Lightly grease two 4-oz ramekins or a muffin tray.
  2. Start making the cake batter by sifting the cassava flour, coconut flour, carob powder, and baking soda into a large bow. Whisk to fully combine.
  3.  Add applesauce, coconut milk, and avocado oil and stir to incorporate all ingredients.
  4. Evenly distribute the batter between the two greased ramekins or two muffin molds. If using ramekins, place them on a sheet tray so they are easier to take in and out of the oven.
  5. Place cake batter in preheated oven and back for 25 minutes, or until they pass the tooth pick test (stick a tooth pick in the center of the cake, and if it comes out clean, they are done)
  6. While the cake is baking, you can get started on the first two steps to make the frosting.
  7. In a small sauce pan, combine coconut milk and cassava flour and warm over medium low heat. Stir until it turns into a paste, about 5 minutes. Remove from heat, and transfer to a fridge safe bowl with a lid, and place in fridge
  8. Using a standing mixer with whisk attachment or a large bowl and a hand-mixer, add the palm shortening and maple syrup to the mixer or bowl and whip on high until it is light and fluffy and peaks begin to form. About 10 mins. If it gets too soft and melted, place in fridge for a few minutes to firm up.
  9. By now the cakes should be done. Remove them from oven and let them sit for 5 minutes undisturbed. Then carefully remove them from the ramekins or muffin tray and place on cool rack. You will want them completely cooled before your frost them. If you have time, you can allow them to cool at room temperature, or you can place them in the fridge or even freezer to cool faster.
  10. While the cakes cool, finish preparing the frosting. Remove the coconut milk/flour paste from the fridge, be sure it is completely cooled. Add the paste to the bowl with the whipped palm shorting, and mix until fully combined and fluffy. About 10 mins. 
  11. Once cake is cooled it's time to decorate. Carefully slice the two cakes in half, making four even layers. Begin building your layers. Lay the bottom layer of cake on wax or parchment paper (so you can easily move it to another surface after it's assembled), then add some frosting, then another layer of cake, and so on until you have built your 4 layers.
  12. If you want to be fancy, you can first do a crumb coat. Which means you use a light layer of frosting all over the cake. It is just enough to catch all the crumbs so that you don't see them when it is fully frosted. If doing a crumb coat, place cake back in fridge or freezer to allow the frosting to set before doing the final layer of frosting.
  13. Now you can be as creative as you want. You can simple use a knife and cover the full cake with thick layer of frosting. You could use a piping bag and make a fun design. You could even mix in a little fruit or vegetable juice (a 1/4 tsp or less) to color the frosting. Similar to what I did for Emily's birthday. 
Note; If frosting gets to soft, simply place in fridge or freezer to let it firm up a little. Or if you leave it in the fridge too long and it is hard, use standing mixer or hand mixer, to whip it back to fluffy goodness. 
Note 2.0: The cake and frosting can be kept in fridge for up to 3 days. Which means, you can make the cake a few days ahead and not stress about it as you finish all other preparations. Or maybe you all aren't procrastinators like myself?


Sunday, April 10, 2016

BBQ Beef Pizza (AIP, Paleo)


Last week, I was lucky enough to receive samples of KC Natural AIP Paleo BBQ sauce, and to say I was excited is an understatement. Don't get me wrong there are some awesome AIP BBQ recipes out there, but there is something so nice about having a pre-made version you can dig right into.

Immediately after getting the bottles, I had to open each to test them out. First, I tried the Primal Cherry. It has a nice sweet and smokey flavor which would be amazing drenched over some ribs. Then I tried the Mastodon flavor. It has this sweet, peppery kind of tone that I knew would make a perfect topping for either shredded meat or ground meat like in this recipe. It actually reminds me a little of a sloppy joe type of flavor. Both sauces have such great notes of flavor that make them so different, but really encompass that smokey and sweet flavor you want in a bbq sauce.

This recipe combines my most favorite AIP pizza crusts, from The Healing Kitchen, and this new AIP product by KC Natural to make a yummy pizza that won't make you feel like you are missing anything.


BBQ Beef Pizza


Ingredients

  • One Pizza Crust from The Healing Kitchen
  • 1 lb ground beef
  • 2 medium carrots, finely diced
  • ½ teaspoon sea salt
  • 3 celery stalks, finely diced
  • ½ a medium onion, finely diced
  • ½ cup, KC Natural AIP Paleo Bbq Sauce, Mastodon
  • 2 tablespoons pomegranate infused balsamic vinegar or just balsamic vinegar
  • 1 tablespoon coconut sugar or maple syrup
  • 1 teaspoon garlic powder
  • ½ tablespoon extra virgin olive oil
  • ½ packed cups arugula

Instructions

  1. Follow instructions to make one pizza crust. This can be prepared ahead of time.
  2. Preheat oven to 350 degree F.
  3. Place pizza crust on a parchment paper lined cooking sheet and set aside.
  4. Heat medium frying pan over medium high heat.
  5. Add ground beef and sea salt to pan, and brown.
  6. Once ground beef is cooked, add carrots, celery, and onions to pan allow to cook for at 5-6 minutes, or until the vegetables have softened.
  7. Reduce heat to low and add bbq sauce, balsamic vinegar, coconut sugar, and garlic powder to the meat mixture and stir to combine. Cook for about 3-4. Stir frequently.
  8. Remove meat mix from heat. 
  9. Use extra virigin olive oil to lightly coat pizza crust. This will help keep the meat mix on in the pizza, but also prevent it from soaking into the crust.
  10. Spread the meat mix on top of pizza. Depending on the size of pizza you make, you may have leftover meat. You can either super load up your pizza, or just snack on it.
  11. Place pizza in preheated oven and cook for 8-10 minutes.
  12. Remove from oven and top with fresh arugula. 
  13. Devour and enjoy!


Wednesday, February 10, 2016

Kale Salad with Warm Bacon Vinaigrette (AIP, Paleo)


This simple salad combines some of my favorite flavors to make a delicious and light salad to go with any meal or make it a full meal by topping with your protein of choice.


Kale Salad with Warm Bacon Vinaigrette

Makes 2-3 servings

Ingredients

  • 4 slices of bacon
  • ½ a bunch of large leaf kale (about 5-6 leaves), chopped
  • 2 carrots, peeled and diced
  • 1 avocado, diced
  • ½ cup grapes, halved
  • ¼ cup bacon fat (reserved from cooked bacon)
  • 1 tablespoon balsamic vinegar
  • 1 teaspoon fresh squeezed lemon juice
  • 1 teaspoon maple syrup
  • 1/2 teaspoon garlic powder

Instructions


  1. In a medium frying pan, cook bacon over medium high heat until crispy. Remove bacon from pan and set on a paper towel lined plate. Pour drippings into a medium glass bowl.
  2. Add kale, grapes, carrots, and avocado to a large bowl to combine or distribute between plates for fancy plating.
  3. Add  the vinegar, lemon juice, maple syrup, and garlic powder to bacon fat and whisk together
  4. Drizzle dressing over salad portions and enjoy! To make it a meal, top the salad off with some grilled chicken, salmon, steak, or your choice of protein.


Thursday, January 7, 2016

Seafood Chowder (AIP, Paleo, Whole 30)


There is nothing more comforting than a big bowl of seafood chowder. There are a lot of fantastic recipes out there for AIP chowder, and I highly recommend you check them out too. This was simply my version, based on what goodies I found in my kitchen. I tend to prefer a not so thick chowder, but you might. If you would like to make this a little more thick, I recommend reserving some of the cooked potatoes and blend them separately, then add them back to the chowder.


Seafood Chowder


Ingredients

  • 4 tablespoons lard
  • 2 tablespoons extra virgin olive oil
  • 2 shallots, sliced
  • 1 large carrot, diced
  • 3 celery stalks, chopped
  • 4 oz mushrooms, sliced
  • 1/2 cup white wine*
  • 1 medium white sweet potato, diced
  • 2 cubs bone broth
  • 1 can coconut milk
  • 1 teaspoon dried parsley
  • 1 teaspoon dried dill
  • 1 teaspoons dried basil
  • 1/2 teaspoon sea salt
  • 1 tablespoon cassava flour + 1 tablespoon of water, whisked together
  • 1.5 mixed raw seafood, I used 1 lb of shrimp and 8oz of mussel meat

*use bone broth instead of white wine for Whole30 compliance.

Instructions

  1. In a large stock pot, heat oil and lard over medium heat.
  2. Once oil is warm, add shallots and cook for 2 minutes.
  3. Add carrots, celery, and mushrooms and cook for another 4 minutes.
  4. Pour in white wine, and let cook for about 3 minutes, until it starts to reduce.
  5. Now add  sweet potatoes, bone broth, coconut milk, and herbs to pot. Allow to simmer for 20 minutes to allow flavors come together and potatoes to cook.
  6. Whisk in cassava flour/water mix.
  7. Add seafood to pot and cook for about 10-15 minutes, or until it is cooked.
  8. Serve and enjoy.


Sunday, January 3, 2016

Fluffy Paleo Pancakes (Nut-Free)


The eternal search for a fool-proof fluffy pancakes recipe is real. I am not going to make claims this is it, but it is pretty darn close. While this are not AIP compliant, as they use 1 whole egg, if you have successfully reintroduced eggs, then these bad boys are for you. These pancakes use my favorite flour ever, Otto's Cassava Flour and a little coconut flour, but no nut flour or milk which is a nice change from many of the other paleo pancakes out there.


Fluffy Paleo Pancakes


Ingredients


Instructions

  1. In a large bowl whisk cassava flour, coconut flour, and baking soda.
  2. In a smaller bowl, whisk together maple syrup, egg, 1/4 cup avocado oil, and coconut milk.
  3. Add wet ingredients to large bowl with dry ingredients. Combine with a spoon until mix is completely wet, but don't over combine. You want it to be lumpy. It will be a pretty thick batter.
  4. Heat 1 tablespoon of avocado oil in medium frying pan over medium heat. 
  5. Using a 1/4 measuring cup (fill about half way) to scoop batter into pan and form a pancake. Make sure the mix stays about a 1/4 inch thick, this is how you will get a fluffy pancake. I usually get about 3 in a pan.
  6. Allow it to cook undisturbed for about 3 minutes. Check the bottom to see if it is browned, then flip. Cook for another 3 minutes on the remaining side.
  7. Remove from pan and repeat steps 5 & 6 with the remaining batter.
  8. Serve with your favorite toppings like coconut cream, maple syrup, and/or caramelized apple slices. 
Mix makes about 8 three-inch pancakes.


Wednesday, December 16, 2015

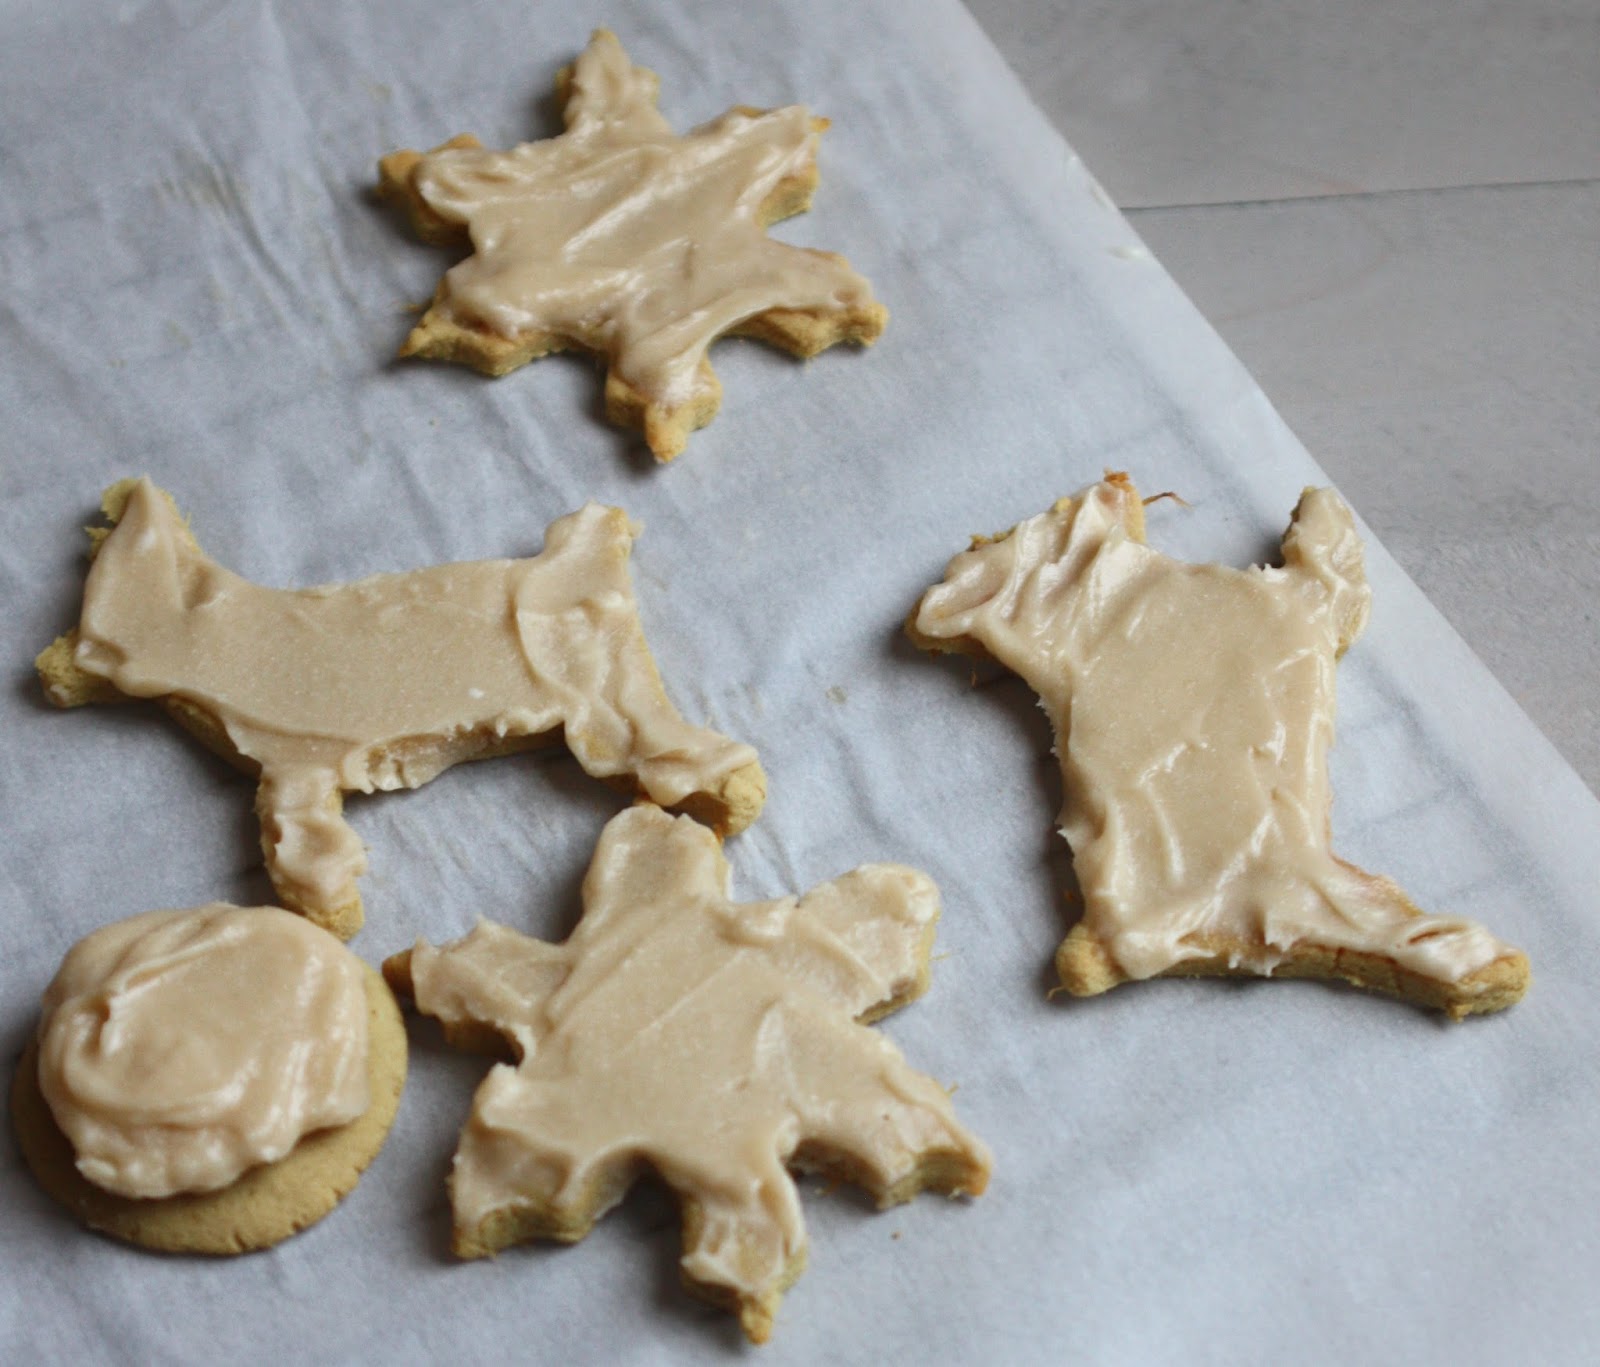
Sugar(less) Cutout Cookies (AIP, Paleo)


Apparently pregnancy has turned me to a baker. Have I mentioned I usually hate baking? I love baked goods, but making them myself almost never turns out. The fact that this is my second cookie recipe in a month that has came out on basically the first try, I have to say it is pregnancy hormone magic.

The fun part about these cookies are that the cookie itself has absolutely no sugar in it. The sweet potato acts as a the sweetener. Also, I share two frosting recipes, both use the same base but are flavored a little different. They do use maple syrup or honey, but if you want to keep the cookies totally sugar free, just leave off the frosting.


Sugar(less) Cutout Cookies


Ingredients


Instructions

  1. In a large bowl whisk together sweet potato, cassava flour, arrowroot starch, coconut flour and baking soda.
  2. Stir in palm shortening and avocado oil, it will be a little crumble still. 
  3. Lastly add in water and stir to fully incorporate. You should have a sticky dough. Form into a ball, wrap in plastic wrap and let cool in fridge for at least 30 minutes.
  4. After 30 minutes, pull dough out and begin to preheat oven to 350 F.
  5. Place a large piece of parchment paper on counter and put unwrapped dough ball on it.
  6. Place another piece of parchment paper or plastic wrap on top of dough ball and roll out dough until it is about 1/4 inch thick. 
  7. Cut into shapes with any cookie cutter. Place cookies 1 inch apart on parchment paper lined cookie sheets. The dough will still be a bit sticky. The best way to move them to the cookie sheets is using a spatula.
  8. Bake in oven for about 12-13 minutes or until the edge just start to brown.
  9. Immediate remove and place parchment paper and cookies on a cooling rack.
  10. Let cool completely and then enjoy on their own or top with one or both of these two frosting options.
Cookies can be kept on the counter in an airtight container for about 4 days.


Frosting Options


Both recipes are developed to cover all cookies. If you would like to make both, half each recipe.

Tangerine Frosting 


Ingredients
  • ½ cup organic palm shortening, softening
  • 5 teaspoons tangerine juice
  • 3 teaspoons cassava flour
  • 2 teaspoons honey
  • 1 teaspoons tangerine zest
Instructions
  • Whisk all ingredients in a small bowl until full combined.


Maple Syrup Frosting


Ingredients
  • ½ cup organic palm shortening, softening
  • 3 teaspoon maple syrup
  • 2 teaspoons cassava flour
  • 1 teaspoons alcohol-free vanilla extract
Instructions
  • Whisk all ingredients in a small bowl until full combined.

Wednesday, November 11, 2015

Easy Healing Chicken and Vegetable Soup (AIP, Paleo. Whole 30)


Tell me this is not a familiar situation for you: you come home from work to sick child or spouse or even you are getting the sniffles. The fancy dinner you had planned for this evening is not going to work now. You have nothing else defrosted and ready to go, but you know you have to make something for the family. More importantly, you want to stop this cold/flu before it takes down the whole family.

This was the situation I found myself in yesterday. Enter my favorite kitchen gadget ever: Instant Pot. I absolutely love that you can just throw everything in it and not worry about defrosting things. You just turn it on, and walk away. Then, like magic, you have the most delicious meal ever and barely did a thing to make it.

This soup took only about 5 minutes to prep and about 45 minutes to cook (counting in pressure and depressurize times). Who doesn't want a big bowl of chicken soup when they aren't feeling so great? Plus, with homemade bone broth, ginger, and turmeric, this soup is ready to battle that cold away. I am unofficially calling it my "Get Better Soon Soup!"


Easy Healing Chicken and Vegetable Soup 

{aka Get Better Soon Soup}


Ingredients


  • 1 lb frozen chicken thighs
  • 3-4 carrots, peeled and chopped or sliced (your preference)
  • 3 celery sticks, diced
  • 2 shallots or ½ a medium onion, finely diced
  • 3 cloves of garlic, chopped
  • 1 sweet potato, peeled, and diced
  • 4 cups of bone broth
  • 1 teaspoon sea salt
  • 1 teaspoon ground ginger
  • 1 teaspoon ground turmeric

Instructions

  1. Add all ingredients to Instant Pot.
  2. Close lid and make sure it is sealed. Using manual, set for 25 minutes.
  3. When done turn off Instant Pot and either let the pressure release naturally, or if you are hungry manually release pressure.
  4. Remove chicken thighs, and shred with forks. Once shredded, and back to pot and stir to combine.
  5. Serve, enjoy and kick that cold to the curb! 
Makes 4-6 servings


Wednesday, September 2, 2015

Carrot Diakon Mint Risotto (AIP, Low-FODMAP, Paleo, Whole 30)


This risotto brings in some new rice options for those who can't have or don't like cauliflower rice. The mint adds a nice fresh element as well. Plus it is fun to use ingredients like, diakon radish, in ways you never thought to.


Carrot Diakon Mint Risotto


Ingredients


  • 3 medium carrots, peeled and rough chopped
  • 1 ½ cups peeled, diced diakon
  • 2 tablespoons of extra virgin olive oil
  • 1 cup chopped bone broth
  • 1 teaspoon sea salt
  • ¼ cup finely chopped  fresh mint
  • 1 tablespoon chopped fresh lavender

Instructions


  1. Add carrots and diakon to food processor and blend in short bursts, about 2 seconds at a time until it is fully riced.
  2. In a large pan, heat olive oil over medium high heat.
  3. Add riced carrots and diakon to pan and cook for 5 mins.
  4. Pour in bone broth, sea salt, mint and lavender to pan and stir to combine.
  5. Turn down heat and simmer in uncovered pan for 20 minutes. Most of the liquid should absorbed. 
  6. Serve and enjoy!


Wednesday, August 26, 2015

Balsamic Cherry Pulled Pork & Sweet Plantain Romaine Boats (AIP, Paleo)


For some reason I always struggle to decide how to serve pulled pork. You can obviously just serve it on it's own, but it always felt like something was missing. It is that starchiness and support of a roll to shovel the goodness in your mouth I just couldn't find. Good news, I have found a solution; fried plantains and romaine leaves.


Balsamic Cherry Pulled Pork & Sweet Plantain Romaine Boats


Ingredients

  • 1½ cup pitted cherries (fresh or frozen), roughly chopped
  • ¼ cup balsamic vinegar
  • 2 tablespoon coconut aminos
  • 1 tablespoon avocado oil
  • 5-6 pound bone-in pork shoulder roast
  • 1 cup bone broth
  • 1 teaspoons sea salt
  • 1 teaspoon ground ginger
  • 1 teaspoon dried rosemary
  • ¼ cup coconut oil
  • 4 yellow plantains (not yet black, but can have a few spots)
  • 1 head of romaine

Instructions

This recipe uses an Instant Pot, however, I have included modifications at the bottom for those using a slow cooker.
  1. In a small bowl, combine cherries, vinegar, and coconut aminos, set aside.
  2. Pat dry pork shoulder, and cut in to 4-5 even pieces.
  3. Set Instant Pot on sauté and add avocado oil to pot. When pot is hot, brown all sides of pork. You may have to do this in a few rounds to make sure there is enough room for each to brown.
  4. Once pork is browned, place back all pieces into instant pot and cancel sauté function 
  5. Pour bone broth over pork, then the balsamic cherry mix, and lastly, sprinkle sea salt, ginger, and rosemary all over.
  6. Set Instant Pot on manual and use the "+" to set it to 75 mins. Close the lid and make sure the valve is on steaming.
  7. When pork is done, turn off the pot and let pressure release naturally.
While the pot is releasing pressure you can start working on the plantains.
  1. In a medium cast iron skillet, warm coconut oil over medium heat.
  2. Peel the plantains, and cut in thirds, then slice lengthwise, so they are about a 1/4 inch thick.
  3. When oil is hot, add plantain slices in a single layer to pan, don't over fill the pan.
  4. Cook on one side for 2-3 minutes, or until it gets a nice brown color, flip and cook for another 2 minutes on the other side. 
  5. Remove from pan and place on a paper towel lined plate. Continue until all pieces have been cooked.
Now the pork should be ready so time to shred!
  1. Remove pork from pot and place in large deep baking sheet or dish. Using two forks, shred pork and remove bone. 
  2. Add shredded pork back to pot and stir to combine with juices and cherries.
Time to assemble!
  1. Take 3 medium romaine leaves, wash and pat dry and set on serving plate.
  2. Place 2 slices of the fried plantains on each leaf.
  3. Spoon shredded pork and cherries on the plantains.
  4. Enjoy!!

**If using a slow cooker you can make the follow modifications: use a large frying pan over medium heat to brown the pork and cook pork and cherries on low for 6 hours.**

Serves: 8


Thursday, July 16, 2015

Easy Braised Cabbage (AIP, Paleo, Whole 30)


Recently, I had the pleasure of guest posting on for Leslie of the The Whole Life Balance. She is a an amazing blogger who shares how to find the balance between life, health, and so much more. In fact, Leslie did a fantastic guest post on Don't Eat the Spatula covering my most favorite topic, Meal Planning. If you haven't read it yet, I highly recommend doing so now!

The recipe I shared on her site is a very simple way to make cabbage that can be cooked up at the beginning of the week and used as leftovers with almost any dish. I usually make a batch of this every week to have it as an easy side. Click here to view the recipe.

Sunday, July 5, 2015

Cherry Turnovers (AIP, Paleo, Vegan)


It's cherry season on east coast and while I could eat them by the handful on the their own, I thought it would be fun to try something new. With the discovery of Otto's Cassava Flour, the Paleo baked good game has really changed. I know I've gone on about this flour before, but it is seriously my favorite. When testing, I have been able to successfully sub it 1:1 with regular flour. which is more than any other options out there. Ok, enough about the flour, it's time to get to these yummy treats.

These cherry turnovers are actually pretty easy to make, though they do take some time due to allowing the dough to rest. My favorite part is that the filling uses no sweeteners at all, not even natural ones.


Cherry Turnovers


Ingredients 


Shell
Filling
  • 1½ cups cherries, pitted and quartered
  • ½ tablespoon arrowroot starch/flour
  • 3 teaspoons lemon juice
  • 1 teaspoons lemon zest


Instructions


Shell
  1. Combine cassava flour, arrowroot starch, and sea salt in a food processor. Just a few pulses to combine.
  2. Cut up palm shortening into small pieces (about a teaspoon each) and add to food processor with the flour. 
  3. Plus mix a few times, 1-second a time, until it is a mix of crumbled flour.
  4. Transfer mix into a large bowl.
  5. Added half the ice water and mix until just combined. Add in remaining water 1 tablespoon at a time until it can be clumped by your hand.
  6. Transfer mix onto a clean work surface such as a granite counter or parchment paper lined counter top. Your mix should look crumbly.
  7. Slowly, one bit of a time, use the bottom of your palm to push and drag out the dough in quick movements. This will help it slowly come together. Do this all the way through twice
  8. Once you have made it through the dough, gather it and mold it into a small loaf.
  9. Wrap in plastic and place in the fridge for 45 mins.
  10. Place dough on a parchment paper lightly dusted with cassava flour.
  11. Roll out into a rectangle. The dough should be about a ¼ thick.
  12. Fold the dough lengthwise into thirds, then following the narrow edge, roll the dough into a circle. It will fall apart a bit, just mold it into place.
  13. Press down the dough into a rectangle and then repeat the process from step 11 once more.
  14. After you coil the dough once more, press it down into another loaf.
  15. Wrap in plastic and place in fridge while you prepare the filling. You can make the dough about to a day ahead or you can freeze the dough for later use.
The method above is based on the one found here.


Filling
  1. In a small bowl, mix cherries, arrowroot starch, lemon juice, and lemon zest until well combined.
Turnovers
  1. Preheat oven to 400 degrees.
  2. Pull out dough from fridge and roll it out until it is around 1/8 inch in thickness.
  3. Cut out circles. I used my Pyrex 2-Cup Round Dish, which is about 4½ inches in diameter to cut out my circles.
  4. Pull and roll out dough as needed to get circles. Using my dish, I got 8-10 circles.
  5. Place circles on a parchment paper lined baking dish.
  6. Carefully spoon filling into the center of each circle, you will use about a tablespoon or so in each. 
  7. Lightly wet the edges of the dough and fold over to crease the middle edge. It will come a part a little on top but that's ok. If it doesn't use a knife to make a few slits on top. You can crimp the edge with a fork if you like, but I personally liked the open look.
  8. Place in oven for 25-30 mins, or until the edges start to brown and the filling starts to pour out.
  9. Cool turnovers on a baking rack.
  10. Once cool enough to eat, enjoy on their own, or drizzle with a little melted coconut butter.


Friday, June 19, 2015

Shrimp Spaghetti Squash Alfredo (AIP, Paleo)


I am excited to share this recipe with you all because not only is it AIP it's also coconut free. There are lot of fantastic remakes of our favorite dishes growing up that have been made AIP, but many include coconut in some form. However, there is a large number of people on AIP or paleo that also have a sensitivity to coconut, which is why I try, when possible, to provide options to leave it out or to not use it at all.

This Shrimp Spaghetti Squash Alfredo is a creamy dish that the whole family can enjoy. The great thing about this recipe is that you can prep the spaghetti squash and alfredo sauce ahead of time and keep them in the fridge a day or two prior to the meal. This makes the actual time to prep and cook only around 10 minutes. Perfect for a week night meal!

To help sett you up to do prep ahead of the meal, I broke out the instructions into three parts: spaghetti squash, alfredo sauce, and then full meal. I also wrote down the estimated prep time for each section to help you plan. It may look a lot more complicated this way, but I promise it's not! Often, when you break down recipes this way it's easier to see what can be done ahead making week night meals a breeze!


Shrimp Spaghetti Squash Alfredo


Ingredients

  • 3 cups, roasted spaghetti squash 
  • 1 small head of cauliflower, cut in florets roughly 2 ½-3 cups
  • 1 cup of sliced onion
  • 1 teaspoon  + 1 tablespoon extra virgin olive oil
  • ½ tablespoons organic palm shortening
  • ½ cup water reserved from steaming
  • ½ teaspoon sea salt
  • ½ teaspoon dried oregano
  • 1 teaspoon garlic powder
  • 1 teaspoon onion powder
  • 2 teaspoons nutritional yeast (optional)
  • ¼ teaspoon ginger
  • 1 teaspoon gelatin
  • 1 lb peeled shrimp

Instructions


Roasted Squash (prep time: 1 hour)
  1. Preheat oven to 325 degrees.
  2. Wash spaghetti squash and prick all over with a fork.
  3. Place whole squash in preheated oven on a baking sheet for 50 min to 1 hour, or until you can easily pierce with a knife. Rotate half way.
  4. Once squash is done remove and let cool until you can handle it to cut in half, remove seeds and scoop out strands into a bowl or container if making ahead.
Alfredo Sauce (prep time: 25 mins)
  1. Fill a large pot with steamer insert 1/3 full with water and put cauliflower florets in steamer and cover.
  2. Place on stove top and turn burner on high and set timer for 20 mins.
  3. While cauliflower is cook, in a large frying pan heat 1 teaspoon of extra virgin olive oil over medium heat.
  4. Add onion slices to warmed pan and cook until they become translucent. When finished add to a large blender or food processor
  5. Once cauliflower is done, add florets to blender with onions.
  6. Add reserved water from pot, shortening, salt, oregano, garlic powder, onion powder, nutritional yeast, ginger, and gelatin to blender.
  7. Blend until full combined and set aside or in container if making ahead
Shrimp Spaghetti Squash Alfredo (prep time: 10-12 mins)
  1. Heat 1 tablespoon of extra virgin olive oil in large frying pan over medium-high heat.
  2. Add shrimp and fry until cooked, around 5-7 minutes. Stir frequently.
  3. Once shrimp is done, add alfredo sauce and spaghetti squash to pan and combine.
  4. Cook for another 3-4 mins or until everything is warmed and fully mixed together.
  5. Serve with your favorite sides. Makes 4-6 servings.


Monday, May 25, 2015

Homemade Italian Dressing (AIP, Paleo, Vegan)


One of the hardest things to find is an AIP friendly or even Paleo friendly salad dressing. Most salad dressing you find at the store include about 20 ingredients that make no sense and about 4 that you actually feel comfortable consuming. As an alternative, many of us learn to live with a little olive oil and vinegar, and that works a good bit of the time. However, sometimes you really want a salad dressing that tastes like one.

When I set about coming up with an Italian Dressing recipe, it was partially because I missed it, but what I missed more was a dressing that can also be used to make Grilled Marinated Summer Vegetables. This dressing can be tossed on a leafy green salad or as a marinade or in anything you would normally use Italian dressing.

Homemade Italian Dressing


Ingredients

  • ¼ cup red wine vinegar
  • 1 teaspoon maple syrup
  • 1 teaspoon minced fresh garlic
  • ¾ teaspoon dried oregano
  • ¾ teaspoon dried basil
  • ¾ teaspoon dried thyme
  • ½ teaspoon fine sea salt
  • ½ teaspoon onion powder
  • ½ cup extra virgin olive oil


Instructions

  1. Place everything but the olive oil in a large wide mouth mason jar or large bowl. 
  2. Use an immersion blender or whisk to combine ingredients.
  3. Once other ingredients are combined, slowly add in the olive oil while blending or whisking.
  4. Store in a mason jar in fridge for up to two weeks. Recipe makes 1 cup of dressing.


Shared on AIP Recipe Roundtable
Featured on Autoimmune Paleo Recipe Round-Up June '15


Sunday, April 26, 2015

Strawberry and Pomegranate Pie (AIP, Paleo)


PIE. I am actually not the biggest pie fan, BUT my mom's strawberry pie was the definition of summer to me. Loaded with sugar and topped with whipped cream, it was my favorite treat growing up. Obviously, there was no way I could have a piece of that now, so I had to figure out how to make something that was just as worthy, but appropriate for my new lifestyle.

This  recipe uses Otto's Naturals Cassava Flour. I am so excited to have found a flour that truly works as a 1:1 substitute to regular flour. It has opened a whole new world for the AIP/Paleo community.


Strawberry and Pomegranate Pie


Ingredients


Crust
  • 1 ¼ cup cassavaflour, plus another tablespoon for dusting
  • A pinch of Salt (approximately 1/8 teaspoon)
  • 2 tablespoons maple syrup
  • 2 tablespoons of avocado oil
  • Up to 6 tablespoons of cold water
Filling
  • 1 cup of blended strawberries 
  • ½ cup pomegranate juice
  • 2 tablespoons of maple syrup
  • 1 teaspoon of gelatin
  • ½ - 3 cups of diced strawberries (depending on how much you want to stuff your pie, hehe) 


Preparation


Pie crust
  1. Preheat oven to 375 degrees F.
  2. Lightly grease pie pan with 1 teaspoon of palm shorting. (I have only tested this recipe with a glass pie dish, so I am not sure how another type will bake.)
  3. In a large bowl, add cassava flour and salt.
  4. Make a small whole in the center of the flour and add in the maple syrup, palm shortening, and avocado oil.
  5. Now get your hands dirty. Use them to mix all the ingredients together. It will be crumbly, this is ok, just be sure to combine, so the flour is no longer powder.
  6. Finally, add in cold water, one tablespoon at a time. It will begin to become dough like, mixing it with a spatula. First it will get a sticky. Add enough water so that it is no longer stick and can be formed into a ball, but don't over work it either so that it is to smooth.
  7. On a clean work surface, lightly dust with cassava flour. Grab your rolling pin and dust it a little too.
  8. Form the dough into a large ball and put it on the dusted surface. Roll out the dough to form a large circle. You will need to do this very slowly and work with the dough, be patient. 
  9. When crust is ready, transfer to pie dish. Crimp the edges with your finger and use a fork to poke the bottom of the crust.
  10. Place in oven and cook for 20 mins. 
  11. Once done, remove, and let crust cool.
This crust can be made a day or two in advanced. If you choose to make it on the same day, you will need to allow time for it to completely cool before adding the filling. This could be a few hours.


Filling

  1. Add sliced strawberries to cooled pie crust. You want to fill the whole crust and for them to be level with the top edge of the crust or a little over.
  2. In a small sauce pan, combine crushed strawberries, pomegranate juice, and maple syrup.
  3. Sprinkle on gelatin and let bloom for 1 minute, 
  4. Over low heat, warm sauce for 2-3 minutes, lightly whisking as gelatin melts.
  5. Once warmed, carefully pour sauce over strawberries so that it evenly covers them.
  6. Place in fridge and let it set for at least an hour. Again you can make this pie a day ahead of time.


When ready to serve, let sit out for about 30 mins to an hour. You can eat it right out of the fridge, but letting it warm, just provides a little better of a texture.
Serve it topped with some whipped coconut cream or a little date syrup if you get your hands one some. 


Shared on AIP Recipe Roundtable


Friday, April 17, 2015

Curried Chicken Salad (AIP, Paleo)


You may or may not have noticed, I have a bit of a turmeric obsession. This recipe, like many of mine lately, came together on a whim. There was leftover chicken that needed to be used and I am always looking for fun new ways to eat jicama. Naturally, it made the most sense to combine the chicken, jicama, and turmeric plus bunch of other ingredients to make an awesome chicken salad.

Plus, I have successfully reintroduced eggs, so I was finally able to make home made mayo again! Don't worry my fellow AIPers who haven't yet reintroduced eggs or unable to eat them, I have three other options for you.


Curried Chicken Salad


Ingredients

  • 10 ounce can of chicken or about a 1 cup of chopped/shredded leftover chicken
  • 1/2 cup of diced apple
  • 1/2 cup of diced jicama
  • 1/3 cup chopped celery
  • 1 ½ tablespoons of homemade mayo*
  • ½ teaspoon turmeric
  • 2 teaspoons of green onions
  • 1 teaspoon of fresh lemon juice
  • Sea salt, to taste

*I have made these two AIP mayo recipes before and they would both work well in this recipe: Egg Free Mayonnaise and Garlic Mayo, both from The Autoimmune Paleo Cookbook. Alternatively, you could use just coconut cream (the part that separates from the water after being in the fridge overnight). 


Instructions

  1. Chop/dice/shred ingredients as mentioned above.
  2. Combine chicken, apple, jicama, and celery in a bowl until well combined.
  3. Add remaining ingredients, and salt to taste.
  4. Serve with some additional chopped green onion.
  5. Enjoy on a cucumber slice, on a spoon, or on top of a bed lettuce.