: Don't Eat the Spatula: pcos - Don't Eat The Spatula
Showing posts with label pcos. Show all posts

Wednesday, August 3, 2016

My PCOS Pregnancy and Breastfeeding Journey: I am Enough

This week is international breastfeeding week. A week I had never been aware of before. Now, just under 4 months after giving birth to my first child, I am so acutely aware of this week and all the emotions it brings up.

See I am firm believer in “breast is best.” I knew, if given the chance to have a child one day, there would be no doubt that child would be exclusively breastfed. I was told throughout my pregnancy, it might be tough at first, but it will get better. I was mentally prepared for some challenges, but I was going to make it work no matter what. I had no plan B. I did not get a pump. I did not get any type of supplementation. I stocked up on all the breastfeeding supplies and didn’t think about any other options.

Unfortunately, life had other plans. But first, before I share what our breastfeeding journey looks like, let me tell you a story.


Let’s start at the beginning. And I mean beginning, when I was just a young preteen girl, wondering why I looked so different from my friends. I started gaining weight for almost no reason, hair began to grow all over my body, and more embarrassingly, my one breast began to outgrow my other by almost two cup sizes. Unfortunately, back then no one thought something was really wrong, and doctors weren’t educated in identifying this developmental signs in teenagers (honestly, they still really aren’t able to). I was too embarrassed to really figure out what was wrong.

Fast forward to age 19. I have gone through high school with these struggles. Hated my body for being broken, but even more frustrated because I didn’t know what was wrong. I was fortunate enough to study abroad in England for my spring semester sophomore year. During our spring break, I was traveling through Europe with friends when I end up hospitalized for an incredibly painful, infected cyst in a very unpleasant area. Following the removal of said cyst, I was flown home to recover. During my surgical follow up with my new OB, she said to me point blank, “has anyone told you, you have polycystic ovarian syndrome.” Poly-what? No, I had not known this nor did I even know what that even meant. Through her brief overview, she explains that it is an endocrine disorder that cause an imbalance in your hormones. It can also cause your body to become insulin resistant, which is when your body is unable use insulin properly and it then builds up in your system. Being 19 and wanted to get back to my English boyfriend, I simply just said “ok” and didn’t think much about it. I assumed we could talk about it all out when I get back, since I was recovering well. 


When I returned to the USA, I began medical treatment to help with the PCOS symptoms I was placed on metformin (a common drug used to treat diabetes), birth control, and spironolactone (to help with aldosterone production). I was told my blood sugar levels showed I was pre-diabetic. I would need to go on a low carb diet with no more than 30 grams of carbohydrates a day, and I would have this disorder for the rest of my life. Yup, felt like the world was pulled out from under me. As I did my initial research I kept seeing over and over again that PCOS is one of the leading causes of infertility, though this was not something I was thinking about at that age, it always sat in the back of my mind.

Over the next 10 years I cycled between acceptance, rejection, depression, self-loathing, self-pity, and so much more in dealing with PCOS. After taking medication for about 5 years and seeing no improvement and really just feeling even crummier, I weaned myself off all medication, but the birth control. Shortly after I discovered the paleo lifestyle, I begin reading more about what I put in my body and how it can truly impact my disorder. I begin taking steps to better myself the right way. While I still don’t see significant weight loss, my blood sugar levels returned and stay at normal, and I start to feel better. In December of 2014, I took it one step further and begin working with a naturopath and started the autoimmune protocol in hopes to figure out the puzzle pieces.

June 2015
In August of 2015, we are shocked and surprised to find out, I was pregnant with our first child. Truthfully, I had only stopped birth control just a few months before, which I had done so to try and get my hormones working correctly on their own. As mentioned earlier, I had heard so often that infertility is one of the most common symptoms for those diagnosed with PCOS. At this state in my life, I had started to consider not having children. I kept using the excuse of wanting to get healthier, which was true, but mostly I was afraid of trying when it was very possible it couldn’t happen. I had seen many friends suffer through infertility and I just wasn’t sure I could handle it.

I wish I could say I was happy then, to have been able to conceive naturally, but in truth that was only the beginning. Due to the PCOS, my weight (a result of the PCOS), and body not knowing how to work properly (also because of PCOS), I was considered a high risk pregnancy. With everything single visit to the doctor, my heart would race and I would hold my breath with fear that there would be no heartbeat. Even after we made it passed the first trimester, that fear never faulted. Once passed the first trimester, more concerns arose.. The baby was not showing incredible growth, and
by my third trimester, I was going for weekly, then twice a week scans to monitor her activity. At 32 weeks I was told by the high risk doctor they would not allow me to continue passed 38 weeks and that if she had not arrived by then, I would have to be induced. They could not give us any real reason for what was wrong, but simple with her growth slowing and then stopping, they needed her out sooner to prevent anything more serious from happening to her.

On April 14, 2016 at 9am, despite my best attempts, we arrived at the hospital to begin my induction using pitocin. Though the pitocin did not exactly fit into my ideal birth plan (when does your birth plan ever go as it should), my amazing midwife, doula, and nurse allowed me to have a very meaningful, pain-medication free, hypno-birth. For once, something actually gone right in this whole pregnancy. There were no complications, no major causes for concerns, and within 16 hours from starting, we were able to meet beautiful baby girl. She was perfect and healthy and I was feeling elated. I had done it. I had proven so many wrong. I felt like I could breathe this huge sigh of relief. The worst was over. She was here and healthy, and it will only get better from here.
2 weeks old


Don’t get me wrong, I knew being a new mom with a newborn was not going to be a walk in the park. There is a big learning curve, and as I had been warned, breastfeeding, is something you have practice. We were able to leave the hospital the day after our daughter was born. She seemed to be doing ok, but did lose about 5% of her birth weight. As I have learned, this is very normal and nothing to be concerned about. We nursed as often as we could, and spent most of our time skin to skin.  We made arrangements with her pediatrician to go in on day 4 because we were going to stop in the day before for the free breastfeeding drop-in held at the hospital by the head lactation consultant.

As we arrived at that first drop-in, completely clueless, but ready to learn, we weighed our daughter. She had now dropped down by 12% of her birth weight. I immediately burst into tears. She was to be gaining back her weight at this point, not losing more. We stayed there with the LC for the next 3 hours working on her latch. It is cleared she has both a lip-tie and a tongue-tie. This meant she was not getting full mobility of her mouth. Additionally, she was acting very much like a pre-term baby (though technically born at term). This meant she had not developed her suction skills and would need some training. Phew, that was a lot to take in. Because we were unable to get a good latch due to her restrictions, I was going to need to pump to at least help build my supply. But, I didn’t have one, because I was oh so confident things were going work out. The wonderful LC gave me a free one she was given as a sample. We had spoken with her pediatrician and he agreed with the recommendations from the LC.

Tattered and torn, I picked myself up and went home to get to work. Just two hours after returning home from the drop-in, I knew something was wrong. It had been a few hours since she last ate. As advised by the LC, I tried to wake her. She wasn’t responsive. She was just a limp, sleeping baby. We tried everything to wake her up, but nothing worked. Not sure what to do, we called the pediatrician. He advised us to try and give her a little formula via syringe to see if that will jump start her, otherwise, we would need to go to the hospital. The dreaded “F-word”. My baby is only 4 days old and I was being told to give her formula. My milk hadn’t come in and I was only able to express drops. It was either formula or starve my child. In that moment I knew I needed to get her food. She woke up when the formula hit her system. I let out a breath I had been holding in for the last 2 hours. We weren’t in the clear, but at least she was responsive.

7 weeks old
Over the next several weeks, we did a combination of finger feeding, supplementing at the breast, and then eventually the bottle. Each and every day I cried. I cried because I worried about not giving her enough food. I cried because I should have been able to feed her with my body, but it wasn’t working. I cried because I constantly worried she was hungry. Her weight gain was struggling, my milk never seemed to come in and things were not going well. We did as instructed and nursed and nursed, but she always need more. She would scream when I brought her to me, and I would get so frustrated with her and myself and the process. We had to take a step back. The goal became, getting her to gain the weight she needed. Separately, I was working on increasing my supply. I hired a private lactation consultant. Renting a hospital grade pump and started on all the supplements I could get. I tried it all. I began to hate feedings and dread the one job I had, which was feed my baby. Something had to
change. My husband, who was a formula fed baby, kept saying that it would be fine and that some babies just are fed that way. I was heartbroken. How could this be?

It was just 2 weeks shy of our daughters two month check-up. I could see myself spiraling down. I was not eating, not sleeping, and beginning to doubt myself as a mother. One of the many symptoms of PCOS I know I have struggled with in the past was depression which meant I was at a higher risk of developing postpartum depression. I set a goal, we would give this all until 2 months. If she is not improving and neither was I, she would go to formula and we would just let it all go.

I woke up the next day determined to change my mind. I started looking for more answers. At this point we were able to fix/manage any problems on our daughters end. It was time for me to focus on myself and find out what was going. As her appetite grew, my supply never did. On a good day I was about to pump around 25% of her daily intake. Suddenly, one day, I found the answer through a mom Facebook group. First, I learned, I was not alone. This low supply was real.

IGT and IR. These two acronyms were the reason my body was unable to do what it should instinctually be able to do. IGT, insufficient glandular tissue. This occurs during the development stage of a young girl’s life or in pregnancy. There are several markers of IGT:

  • widely spaced breasts (breasts are more than 1.5 inches apart)
  • breast asymmetry (one breast is significantly larger than the other)
  • presence of stretch marks on the breasts, in absence of breast growth, either during puberty or in pregnancy
  • tubular breast shape (“empty sac” appearance)*

There it was in black and white. I was a text book case of IGT. It was even clearer this was a direct result of my developing PCOS at a young age. In addition IR, insulin resistance, shows its ugly head. When your body produces and overabundance of one hormone, it sets off an imbalance of all other hormones. When you breastfeed, you produce two hormones: prolactin and oxytocin. Since my body has an issue properly using the hormone insulin, it is constant battle to maintain proper balance. All this to say, it is clear my body is working against me once again.
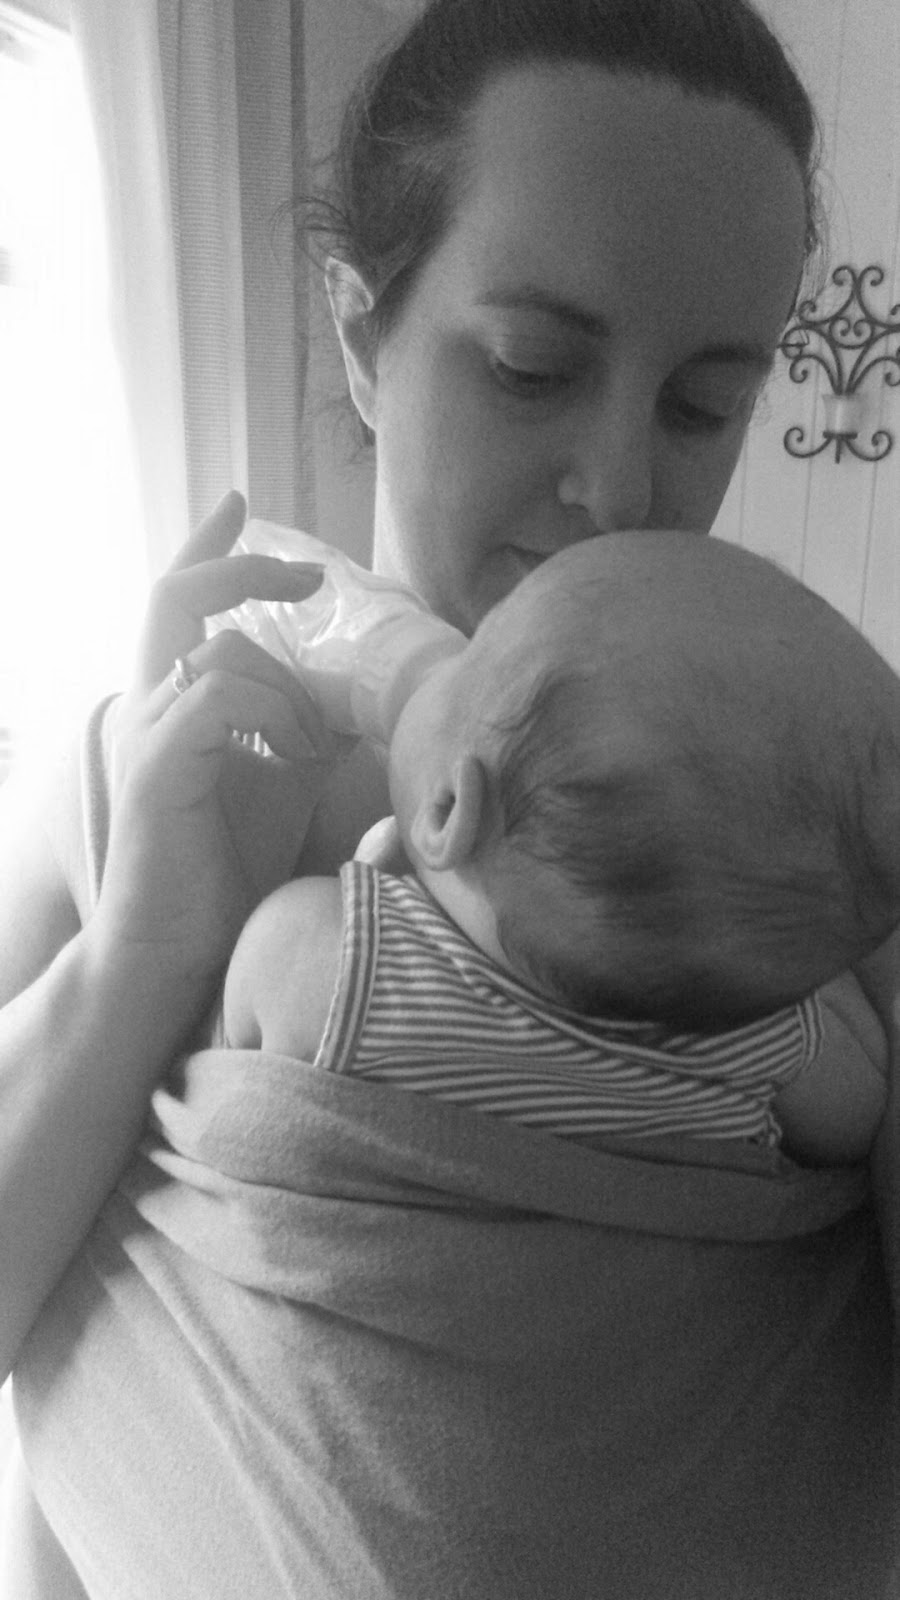
14 weeks old

Alright, so what does this all mean? It means my ideal breastfeeding relationship is not going to happen, and never will. I pump ever 2-3 hours a day and get, at best, 25% of Emily’s needs. The remaining is made up of mostly formula with some donor milk we have been fortunate enough to receive. We comfort nurse a few times a day, when it works, if it doesn’t, we simply enjoy being mommy and baby.

What have I learned through this entire experience?

1. Never stop seeking answers to your health. There is a serious lack of research and support for under producing mothers. I recently read an article** that hit it right on the nose. The author wrote:
“If something was wrong with your liver, would you go to the doctor?”
“Yeah, of course,” I replied.
“OK, stop right there,” he said. “If you’ve got a breastfeeding problem and you go to the doctor, what’s going to happen?”
“Well, yes, I know,” I started. “If you’re lucky enough to have access to one of the few breastfeeding medicine doctors in the US, maybe they’ll order a couple of diagnostic tests. Otherwise, hopefully, you’ll be referred to a lactation consultant.”
2. Breast is best, but only if your breasts work. I was fortunate to have an incredibly support team around me that helped me catch on quickly. For a large percentage of women, nursing on demand will be the answer for weight gain and milk supply. BUT depraving a child of nutrition and nourishment can be just as damaging.
3. Surround yourself with the right team. If something isn’t right, and everything a provider is telling you to do isn’t working, then maybe it is time to change. I was recently speaking with the LC from the hospital (whom I still see weekly). She said to me, “if something isn’t working, you can’t try harder, you have to try something different.” This saving angel saw very quickly in me signs of PCOS, IR, and IGT. She saw that the advice she gives to a majority of moms was only going to get me so far. We changed tactics and approach. Make sure you are able to find someone who can work with you.
4. Just because your body has failed you, does not make you a failure. I have found this incredible community of mothers who have gone through many of the same struggles as me. They have taught me that regardless of how much or how little milk my little one gets from me, it all counts. Each and every drop contains the same amount of nutrients and antibodies.
5. Nursing is more than feeding. When a momma and baby nurse there is a unspoken bond and comfort that comes along with it, regardless of how much milk baby is able to remove from the milk or the amount of milk the mother’s breast is able to provide. This bond is something only you and your baby can experience. In fact, mothers how adopt using nursing as a way to create this bond.
6. Mourning is part of the process. Similar to when I was first diagnosed with PCOS, I had to go through a mourning period. I will never be able to have the breastfeeding relationship I had hoped to have with my child. It was ok to be upset and mourn this loss. When I allowed myself to get mad about it, about my body letting me down, I was then able to move on and move forward.
7. It is ok to stop. When I finally gave myself a deadline, a goal where if we made it to this day, then it would be ok to hang in the towel, I felt almost an immediate sigh of relief. We have made it passed that goal and have set another one, but when the times comes for me to hang up my pumping equipment and follow her nursing lead, it will be ok. 

I share this all with you today as a way to finally face the truth of our situation. There is nothing more I can do to change what cannot be changed. If sharing my story helps just one mom or identifies with just one person then fantastic. If no one bothers to read this entire post (it’s long I know), that is ok. This one is for me. This post it’s to remind myself of how far I have come and in those moments of jealous towards those who are so easily able to breastfeed, I can remind myself, that I am enough.


Tuesday, September 29, 2015

Guest Post: My Whole 30 Experience

I am beyond excited to share this guest post from someone so incredibly special to me: my mom. Recently, she finished her very first Whole 30. As someone who has been supportive of me in all I do, I am beyond proud of her. I asked her if she could share her experience with you all. Without further ado, ladies and gentlemen, my mom. P.S. please feel free to ignore the amount of non-food related pictures of my mom and me, I just love her to pieces. :-)


I was never planning on doing Whole 30, ever!  I do not like to deprive myself and I was quite happy eating whatever I wanted, thank you very much.  Of course I was overweight and struggling with an autoimmune disease, but still was not motivated enough to try and change my eating habits.  I bit of history.  In my first year of marriage I put on 50 lbs without hardly even noticing it!  I struggled to try and loose weight over the next five years, but nothing I tried ever worked. Then I had my first daughter and put on a few more pounds.  Five years later, I had my second daughter, and even though I hardly put on any weight during that pregnancy, I put on more weight after she was born.  For the next 20 years while raising my girls, I just could NOT loose weight no matter what I tried!  So by the time I was diagnosed with RA in my early 50’s I just thought - I am in pain daily, I am going to eat whatever I want!  And I did.

When my oldest daughter was diagnosed with PCOS in her 20’s I realized that I had all of the same symptoms. By this time, I had had a complete hysterectomy and was trying to deal with all the fun things that go along with that!  Hello hot flashes, weight gain and chocolate cravings!!

So where does Whole 30 come in?  My oldest daughter had started cooking AIP and I thought she was crazy!!  Giving up all those foods, cooking everything from scratch, so.much.work. I encouraged her from a distance, but that was NOT for me!  Then my youngest daughter discovered that she had a gluten intolerance, and when she cut it out of her diet along with sugar, she saw a huge improvement.  So with both of girls seeing so much success by trying an elimination type diet, I started wondering if I could be helped by doing the same thing.

Well, that is when the research started! My family knows that I am the queen of research, and until I have checked out EVERY possible option, I cannot start anything.  I knew I did not want to do AIP, and that is when I found whole30.com  At first it looked daunting, but then I
found the wonderful website of Mellisa Joulwan and her cook books Well Fed and Well Fed 2. Between these two websites I gathered a wealth of information and all my questions were answered. On Mellisa’s site she has a very helpful shopping list and prep list that I followed, and it  REALLY took the guess work of how to get started.

So, now that I was armed with all my information and research, I had to convince my husband, that for the next 30 days we would not be eating any sugar, dairy, grains, legumes, soy and alcohol!  I decided to  used two strategies. 1. I eased into it, and  2. I didn’t tell him!  The week before we started Whole 30, was vacation time for us.  We had planned a week long “Staycation” and this is when I tested some of Mellisa’s great recipes.  I just presented them to my husband as “new” recipes I was trying.  He loved them.  We both loved them.  That was the moment I thought to myself, “I think I can do this, at least for 30 days”

One of the things that the Whole 30 recommends is that you take a week or so to prepare yourself and your kitchen for the start of your 30 day reset.  This was the best advice.  I stocked up on meat and veggies and eggs.  Oh, the amount of eggs we went through was truly astounding!  The other thing I did, was buy a nice insulated lunch box for my husband.  After all he was going to be carrying a full lunch with him everyday to work, and if I went to the all trouble to prepare it for him, I wanted it to stay cool and edible! This worked like and charm, and every evening I would package up leftovers into containers and stack them in the fridge for the night and then throw them into his lunch box in the morning along with some cut up veggies and some fruit.  I also got up and made him a simple breakfast of eggs, sausage and fruit EVERY MORNING, knowing that if I did not do this, he would eat nothing at all as he has done for years!  So, yes there was a lot of cooking and prep to do, but I did batch cooking on Sundays and that made things SO much easier.    It’s one thing to have  all the ingredients for a recipe in your fridge and cupboards, but it is a WHOLE ‘nother thing when the actual meal is cooked and sitting there in your fridge ready to just pull out and heat up!

The first week was a little rough, especially for my husband because he was missing his coffee and tea, badly.  Coffee and tea is allowed on Whole 30, but with no sugar or creamer.  According to my husband, tea or coffee without sugar or cream is just NOT worth having, so we just gave them up altogether.  I drank some herbal mint teas and I made mint iced tea with mint from my garden.  I would say that by keeping our menus varied and interesting, with a lot of new recipes, we did well through the first two weeks.  We felt more energetic, and I definitely felt much lighter.  That is the wonderful thing.  I was eating a lot of food at every meal, but I never ever felt stuffed.  By week three and four we were in a rhythm and were not even craving sweet things anymore.  I had successfully eaten out with a friend twice and stayed on track.  It felt really good.

When the end of the 30 days rolled around, we weighed ourselves.  Astonishingly, we had both lost about 15 pounds!  That was the most weight I had EVER lost on any program, any time!  We were thrilled, and without even saying anything out loud, we just decided to keep on eating this way!  I have introduced a few things back into our diets. I have added back a little honey or maple syrup into my homemade salad dressing and we are eating a little bacon now and then.   We are still grain free, but I am starting to experiment with some alternative flours for baking.  We love the way we feel and probably will continue to eat this way for now.  We are both hoping to loose some more weight, and I think the way we will achieve that, is to cut back a little on the fruit and up the veggies!

For me this has really been a revelation.  Never in a million years did I think I could stick to this for 30 days!  Also, I never believed that my cravings for sweets and chocolates and bread could just disappear, but they did. Some other “non scale victories” as they are called in the Whole30 program, better sleep and  more energy.  I even took a short hike with my youngest daughter in the woods!  What!  My husband and I now try and go on more walks around the neighborhood. He even dug his bicycle out of the shed and goes for short rides on the weekends.  My advice if you are thinking about doing Whole 30, is,  do your research, find support (there are a LOT of Blogs and Instagram) have a plan and then, JUST DO IT!  It’s only 30 days!

Wednesday, July 22, 2015

Guest Post: Why You Should Meal Plan


I am so excited to welcome Leslie Auman from leslieauman.com to the blog today! Prior to starting her career as virtual assistant for teacher-sellers she had a blog focused on her lifestyle and food choices since going Paleo. She is on the blog today to share her secrets for successful meal planning.


I like to talk about finding balance in life. A lot. For the last several years, my life has been very lopsided in one direction: focusing too much on school and work. I’m only a couple of years out of grad school, so my school days aren’t too far behind me, and as you might expect, they dominated my life much of the time while I was in it. That being said, I know how hard it is to want to take the time to set yourself up for success. When you’re so consumed with one thing, very often any energy you have for doing anything else is quickly zapped. For those of us in the Paleo and AIP lifestyle, and especially for those who are new to it, that loss of energy has a domino effect. We don’t have the energy to meal plan, so we don’t know what to have for dinner. Because we don’t know what to have for dinner, we maybe grab something on the way home from work, go out to eat at a restaurant, or make something at home that’s less than nutritionally desirable. Since we ate something “unhealthy,” we get mad at ourselves and feel bad about how we look, about the regression in our progress, or about letting ourselves down. Then what? The cycle repeats. Where is the balance?

My goal today is to help you understand why you need to meal plan. Does that domino effect above sound familiar to you? I figured as much. Do you enjoy it? I didn’t think so. People who commit to this lifestyle for a long time can often get by without too much effort, or their systems and routines are so instilled that they do them without a second thought. But what if you’re not there yet? How do you get to that point? That’s what I want to talk about today, and it’s something that will most definitely help bring some balance back into your life.


So, what is meal planning? Meal planning is the act of planning out what meals you will eat each day for a period of time, most commonly one week. You find or create a calendar­like template, and you write down everything you plan to eat for each meal. (Pro tip: Use your meal plan to help you create your grocery list so that you make sure you have everything you need.) Here are some FAQ’s that you might have about meal planning:
  •  Do I have to plan different selections for every meal? No! In fact, I suggest you batch prepare and cook whenever possible. I’ll talk more about this later, but essentially, you can plan to make a big batch of one meal and portion it out in glass storage containers to take as your lunch every day of the week, as one example. This not only saves you time, but it also saves you money so that you aren’t buying more ingredients at the store. 
  • Where do I come up with meals to plan? When I first started out in the Paleo lifestyle, I had no Paleo cookbooks, so I relied on the Internet a lot. There are some great Paleo and AIP recipes out there, even more so now. However, I now have a large collection of Paleo and AIP cookbooks. Use what you have, and don’t think you have to come up with meals in your own brain. There’s no reason to reinvent the wheel here ­­just hop online and search “Paleo crockpot beef,” for example, and see what comes up. 
  • Do I have to stick to my meal plan? While I strongly recommend sticking to the meal plan, if something comes up that you can’t, then don’t be too hard on yourself. When I end up skipping meals on our meal plans, I often just recycle them onto the next week’s meal plan, which makes it a little easier! Also, I sometimes switch around which nights I decide to cook things. Maybe I planned taco night for Friday night, but I actually want it on Wednesday night, so I just make it then and put off Wednesday’s planned dinner until Friday. 
  • Can I find meal plans that are already created? Yes, you sure can! Once you start buying Paleo cookbooks, many of the authors generously include weekly meal plans (with recipes from the cookbook) in the back. You can also search online. For example, Civilized Caveman Cooking has a few pages of his blog dedicated to weekly meal plans that he creates. Find them here


Now that we have a better idea of what meal planning is, I want to take some time talking about why you do it. There are actually a few reasons why meal planning is extremely beneficial, even if it seems time­-consuming and tedious.
  1. It saves you time. Wait...what? Didn’t I just say that it’s time­consuming? I sure did, because I usually feel like meal planning takes me longer than it should. However, it saves me time in the long run. Once it’s done, and once I’ve bought all of the groceries I need for the week to make everything on the meal plan, all I have to do is look at it to find out what meal is planned and in which resource I can find it (e.g. which cookbook or website). I don’t have to waste time browsing my fridge and pantry trying to decide what to eat. I don’t have to waste time going back and forth with my boyfriend about “What do you want to eat tonight? Do burgers sound good? No? Okay, what about chicken thighs?” Look. Find. Cook. It’s that easy, and now you have a little more time to spend doing the things you want to do. 
  2. It saves you money. Not having a meal plan often leads to impulse buying. Why? Because you have no idea what you and your family might want to eat, so you buy a little bit of this and a little bit of that, and before you know it, you’ve dropped a couple hundred bucks on groceries. When you meal plan, you’re much more likely to only buy the groceries that you need, based on your meal plan. You’re also much more likely to skip on eating out at a restaurant or grabbing something on your way home from somewhere. Additionally, if you batch cook like I mentioned earlier, you’re buying a little extra of one small group of ingredients to make it last for a few days instead of buying lots of different ingredients to make up something on the fly. 
  3. It’s a stress reliever. I bet that there are a lot of you who feel stressed out by eating. When to eat? What to eat? What if I don’t have the ingredients I need to make what I want to eat? Meal planning takes all of those “what ifs” away. You know exactly what you’re going to eat on which day(s), and you have the ingredients stocked in your fridge or pantry to make that meal.

Do you see where I’m going with this? You should meal plan because it helps to bring some balance back into your life. When I don’t meal plan, I feel a little lost, and I don’t prioritize making sure I eat enough meals per day (i.e. I often skip lunch in that case). Without structure, we fumble, and, ultimately, we might fail. And failing leads to...the domino effect above. It’s not a fun game, and it’s time to take control. I have some tips on how to get started with a meal planning routine.
  • Choose what day of the week you’ll meal plan. I prefer to do mine on Thursdays because we usually go grocery shopping for the following week on Fridays. 
  • Choose what day of the week you’ll go grocery shopping. Do your grocery shopping either the same day that you meal plan or the next day. Stock up for the whole week to avoid extra trips to the grocery store and potentially having to spend unnecessary money (which you’d be doing anyway when you consider gas usage in your vehicle). 
  • Decide whether you’re interested in doing any food prep, and if so, decide what day you want to do it. Food prep can mean two things: 1.) taking the time to prepare your ingredients so you can just grab and cook them whatever day you need them, like chopping all of your veggies for a meal and storing them in a baggie or container until then. 2.) taking the time to batch cook your meals ahead of time and portioning them out into storage containers so that they’re just grab­-and-­go for the week. (Side note: Batch cooking is when you take a few hours one day to cook up all of your meals for several days or to cook up necessities, like bone broth, gummies, or freezer-­ready breakfasts so that they’re ready when you need them. I used to batch cook both my breakfasts and lunches for the entire work week every Sunday.) 
  • Decide how many meals you’re going to plan. I used to only plan out our dinners, but eventually I started planning out all of my meals. Think about your lifestyle and what works best for you. Maybe you’re not big on breakfast, or maybe you have a cafe near your work that serves compliant food that you like to patron for lunch. Only plan the necessary meals. 
  • Gather your resources to help you get meal ideas. This could be sitting down at your computer to surf the Internet or grabbing a pile of cookbooks (or both). 
  • Complete your meal plan. Write it in pencil if you like, so that you can change things around if you need to. The meal plan template I created for myself includes breakfast, lunch, dinner, and snacks, and in each box I can write the cookbook and page number where I can find the recipe later when cooking it up. When I’m batch planning, I often just draw an arrow from the first box down through the next few days. 
  • Put your meal plan in a visible place. I use magnets on our fridge to hang our meal plans right on the freezer door so that they’re in plain sight all the time. 
  • Reuse your meal plans. I personally don’t do this, but I would recommend to anyone starting out with the meal planning process to save all of your old meal plans rather than getting rid of them. Then, you have old meal plans you can reference for inspiration or for meals that you really loved without digging through cookbooks or the sinkhole of the Internet! 

Are you excited to get to meal planning? I’m excited for you! Think of how much more time, money, and happiness you’ll have with this skill under your cap! Thanks so much for reading today, and I hope you find my suggestions useful. Until next time!

Wednesday, June 10, 2015

Blueberry-Pomegranate Gummies (AIP, Paleo)


Who doesn't love a yummy, simple gummy recipe? As most recipes go in my kitchen, it was created when I grabbed a few things that were already in the kitchen and played with a combo that sounded good to me. These gummy treats only use three ingredients and no additional sweeteners, like honey or maple syrup.

A little fact about me, I have a growing collection of gummy molds. Earlier this year, my sister went to Australia and brought me back a mold that had a koala, kangaroo, and map of the country. It was basically the most awesome thing ever, and goes so well with the cat and dog molds I already had. You can basically find mold for anything you want, but the good news is, you can make this even if you don't have a mold.


Pomegranate-Blueberry Gummies


Ingredients


Instructions

  1. Add the blueberries and pomegranate juice to a small sauce pan over medium-low heat and set timer for 5 minutes.
  2. When time is up, use immersion blender to blend up blueberries with pomegranate juice.
  3. Take pan off heat and slowly whisk gelatin in ½ tablespoon at a time. 
  4. Pour mix immediately into molds or in a parchment paper lined baking dish.
  5. Place in fridge for at least an hour or until it gels. 
  6. Pop out of molds or cut into squares if using a baking dish.
  7. Enjoy! 
Keeps in fridge for about a week, if they last that long


Shared on AIP Recipe Roundtable
Featured on Autoimmune Paleo Recipe Round-Up June '15


Friday, April 17, 2015

Curried Chicken Salad (AIP, Paleo)


You may or may not have noticed, I have a bit of a turmeric obsession. This recipe, like many of mine lately, came together on a whim. There was leftover chicken that needed to be used and I am always looking for fun new ways to eat jicama. Naturally, it made the most sense to combine the chicken, jicama, and turmeric plus bunch of other ingredients to make an awesome chicken salad.

Plus, I have successfully reintroduced eggs, so I was finally able to make home made mayo again! Don't worry my fellow AIPers who haven't yet reintroduced eggs or unable to eat them, I have three other options for you.


Curried Chicken Salad


Ingredients

  • 10 ounce can of chicken or about a 1 cup of chopped/shredded leftover chicken
  • 1/2 cup of diced apple
  • 1/2 cup of diced jicama
  • 1/3 cup chopped celery
  • 1 ½ tablespoons of homemade mayo*
  • ½ teaspoon turmeric
  • 2 teaspoons of green onions
  • 1 teaspoon of fresh lemon juice
  • Sea salt, to taste

*I have made these two AIP mayo recipes before and they would both work well in this recipe: Egg Free Mayonnaise and Garlic Mayo, both from The Autoimmune Paleo Cookbook. Alternatively, you could use just coconut cream (the part that separates from the water after being in the fridge overnight). 


Instructions

  1. Chop/dice/shred ingredients as mentioned above.
  2. Combine chicken, apple, jicama, and celery in a bowl until well combined.
  3. Add remaining ingredients, and salt to taste.
  4. Serve with some additional chopped green onion.
  5. Enjoy on a cucumber slice, on a spoon, or on top of a bed lettuce. 


Sunday, April 12, 2015

No-Egg Waffles (AIP, Coconut-Free, Paleo, Vegan)


Recently I got my very first bag of Otto's Cassava Flour. Filled with excitement, I contemplated what to make first. My mind began swirling with ideas. I decided to make something, that was not these waffles. It turned out pretty good, but needed another go.

Then I had a thought, let's see if I can make waffles with the flour. My goal was to try and come up with a recipe that was simple and that many could enjoy. The first try was a complete success. There was fluff, there was flavor, there was a waffle I could enjoy! So of course I had to share it with you all as soon as possible.


No-Egg Waffles 


Ingredients


  • 1 and 1/4 cup cassava flour
  • ¼ teaspoon arrowroot starch
  • 1 ¼ teaspoon cream of tartar
  • ½ teaspoon baking soda
  • 1 teaspoon cinnamon
  • 2 tablespoons maple syrup
  • 3 tablespoons avocado oil
  • Up to 1 and 1/4 cup of cold water

Instructions


  1. Preheat waffle iron.
  2. Mix dry ingredients together in a large bowl.
  3. Make a small hole in the dry ingredients and pour in the wet ingredients minus the water. Slowly add in the water a 1/4 cup at a time until it because slush like. You don't want it too soupy (pancake like) but thicker than that. If it becomes too wet, add a little more cassava flour.
  4. Grease waffle iron and pour in mix to suitable size portions for machine.
  5. Let them cook for just a minute or two past the timer.
  6. Enjoy with syrup, fresh fruit or your favorite toppings.
These are definitely more dense than my other recipe, but are more waffle like. This recipe made about 6-8 waffles, depending on the size.


Featured on AIP Recipe Roundtable


Monday, April 6, 2015

Cabbage and Ground Pork Curry (AIP, Paleo)


Prior to AIP, I was actually never a huge curry fan. Mostly because it always made me feel so icky afterwards. Having now learned about AIP, I realize that is likely I am sensitive to those spices like cumin and coriander. It was not my intention to create a curry recipe. Right now, I am seriously obsessed with putting ginger and turmeric in any dish that works. Additionally, sage and cinnamon are basically the only spices I use when cooking pork, so I decided to through them all in a pan together with some cabbage and see what happened. To my surprise, it tasted great! So I've decided to share this one pan dish with you all.


Cabbage and Ground Pork Curry


Ingredients 


  • 1/2 large head of cabbage, thinly sliced
  • 1 lb ground pork
  • 1/4 teaspoon cinnamon
  • 1/2 teaspoon garlic powder
  • 1 teaspoon sea salt
  • 1 teaspoon ground ginger
  • 1 teaspoon ground sage or 1/2 teaspoon of rubbed sage
  • 1 teaspoon ground turmeric* 
  • 1/4 cup of bone broth (preferably pork or beef)
*If you have access to fresh turmeric, you can also add another 1/4 teaspoon of freshly grated turmeric.

Instruction

  1. Preheat large pan over medium-high heat. Add ground pork and cook until browned.
  2. Divide cabbage in half and add half to the pan with pork. Mix and cook for about 2-3 mins, or until cabbage starts to wilt a little. 
  3. Add in the remaining cabbage and sea salt to pan and stir to combine and cook for another 5 minutes. Stir occasionally.
  4. Add cinnamon, garlic powder, ground ginger, ground sage, and ground turmeric to pan and stir until seasons cover the pork and cabbage.
  5. Lastly add bone broth to pan. Once broth is boiling, reduce heat to low and cover pan with lid or aluminum foil.
  6. Cook covered for 20 minutes on low heat. 
  7. Remove lid and cook for another 5 minutes or until all liquid has disappeared.
  8. Enjoy!


Thursday, March 12, 2015

Super Easy Pork Shoulder Roast (AIP, Paleo)


I have absolutely zero luck with pork in the crock pot, there I said it. Phew. I try recipes over and over again, either I over cook or under cook or I grab the wrong cut and it just never seems to work out. This may sound strange, but it's the truth. I am also super bad at following directions, so this may be part of it. This was the reason why I need something that required the least amount of instruction to equal the best results.

The recipe for this came as a bit of a fluke. I picked up a pork shoulder roast for a good deal at the store and had no clue what I was going to do with it, but had to buy it. When I went to prepare it, I literally grabbed a few of my favorite herbs, tossed them on top of the roast, turned the crock pot on low, and walked away. What came out was perfection! I love it when that works out. And best of all, this is completely approved by my non-paleo hubby, so you know it's a hit!


Super Easy Pork Shoulder Roast


Ingredients

  • 3-5 lb pork shoulder roast
  • 2 tablespoons of minced garlic
  • 1 1/2 teaspoons each of the following: oregano, thyme, marjoram, basil, and rosemary
  • 1/2 teaspoon of sea salt

Instruction

  1. Place pork shoulder roast in slow cooker. If it is wrapped in kitchen netting, you can leave it on.
  2. Rub garlic over the top of roast. Mix herbs together and sprinkle over the top of the roast.
  3. Set slow cooker on low and cook for 9-10 hrs or until roast reaches 165 degrees F.
  4. Remove roast and set on cutting board. Tent it with aluminum foil and let rest for 20 mins. This would be a good time to make your sides, like the Caramelized Fennel and Sweet Potato Sauté
  5. Slice, serve, drool, and enjoy!


Wednesday, March 11, 2015

Caramelized Fennel and Sweet Potato Sauté (AIP, Paleo)


The other day I through pork shoulder in the crock pot (recipe coming very soon!) in the morning and thought, "Yay, head start on dinner!" Of course, when I got to making the rest of dinner, I had completely forgot to come up with a plan for the sides. As I looked at what we had in the kitchen, I knew I could have gone with something we always have, but what's the fun in that? 

My goal was something simple and delicious. I tend to stray away from recipe with too many ingredients unless I have time to plan and prepare. Plus, you don't need to over complicate real food because it is so good on it's own.

Along with being super delicious, this sauté it is super easy to make and only requires five main ingredients. Sometimes you need to change up your vegetable side game, but don't want to over complicate things. I don't blame you, and that is why I am sharing this one with you. Plus this sauté will pair perfectly with the Super Easy Pork Shoulder Roast.


Caramelized Fennel and Sweet Potato Sauté


Ingredients

  • 2 tablespoons of extra virgin olive oil
  • 1 fennel bulb
  • 1/2 a large onion
  • 1 medium sweet potato
  • 1 cup bone broth
  • Sea salt

Instructions

  1. Cut the top steams and hard bottom off the fennel bulb and slice the remaining in to 1/4 thick strips. Removing hard core. Set slices aside. Save a few fronds for garnish.
  2. Thinly slice onions and set aside.
  3. Heat a large pan over medium heat. Once warm, add EVOO. 
  4. When oil is hot, add sliced fennel and onion to pan. Stir to coat everything in oil and then let cook. Don't stir too much, as you want to get a little color (e.g. burnt) on it and let it caramelize. Cook the fennel and onion for about 12-15 mins.
  5. Meanwhile, peel sweet potato, cut in quarters length wise and then thinly slice. Pieces should bite sized and not too thick. You want them to be similar, so they cook evenly.
  6. Add sweet potato slices to pan and stir to combine. Cook for about 5 minutes. just to get a little color on the sweet potatoes. 
  7. Finally, add bone broth. Bring to a boil, then reduce heat to low and little simmer. Cook until sweet potatoes are soft and the bone broth is absorbed. About another 10-15 mins. Add a pinch of sea salt to taste.
  8. Serve with your favorite main dish. Garnish with a little fennel fronds clippings.


Shared on AIP Recipe Roundtable


Sunday, February 22, 2015

Shepherd's Pie (AIP, Paleo)


We all have that one comfort food that reminds them of their childhood and just brings you back home. For me it's, without a doubt, Shepherd's Pie. Growing up, I could eat it every day, all day, all the time. Each year for our birthday, my mom would make us a meal of our choice, and I can positively say, this was always my pick. Then after dinner, I would pass through the kitchen and sneak a bite more of it until it was put away in the fridge.

I have tried on numerous occasions to replicate my mom's famous dish with no avail. Even prior to becoming paleo, I still couldn't get it right. Then one magical night, on a cold Wednesday evening, I finally figured it out. The recipe is inspired by Hold The Grain's Individual Shepherd's Pie recipe with some AIP tweaks as well as a few spice tweaks from my mom's recipe. What I love so much about Tess's recipe is that instead of mashed cauliflower or sweet potatoes in lieu of mashed potatoes, she introduces the idea of mashed acorn squash. GENIUS! It is exactly the perfect topping to take me home!

Shepherd's Pie


Ingredients

  • 2 acorn squash
  • 1 tablespoons of avocado oil
  • 1/2 onion, finely chopped
  • 3 medium carrots, diced
  • 2 stalks of celery, diced
  • 2 cloves of garlic, minced
  • 1 lb of grass-fed ground beef
  • 1 teaspoon salt
  • 1 teaspoon thyme
  • 1 teaspoon marjoram
  • 4 whole cloves
  • 3 bay leaves
  • 1 cup of bone broth
  • 1 tablespoon arrowroot flour
  • 1 1/2 tablespoons of water

Instructions

  1. Preheat oven to 400 degrees. Cut the squash in half and bake for about 40 mins or until you can press shell with your finger. 
  2. Meanwhile, in a large pan, on medium heat avocado oil. Cook ground beef until browned then remove from pan and set aside.
  3. Return pan to stove top and add onion, celery, and carrots and cook for about 4-5 mins. 
  4. Add garlic, beef, salt, thyme, marjoram, cloves, and bay leaves to the pan with veggies. Stir to combine.
  5. Pour bone broth over the mix.
  6. In a small bowl whisk together arrowroot flour and water.
  7. Add arrowroot flour to pan and stir until sauce begins to thicken (about a minute). Remove from stove and pour mix into 2.5 quart casserole dish.
  8. By now your squash should be ready. You will want it to sit out for about 10-15 mins to cool down so you can handle it.
  9. Peel skin off of squash and place the good stuff in a large bowl. Mash with a potato masher until desired consistency.
  10. Pile mash on top of meat mixture and spread out evenly.
  11. Bake dish for 40-45 mins or until edges start to brown.
  12. Enjoy and try not to eat it all in one sitting.


Featured on AIP Recipe Roundtable


Monday, February 9, 2015

Starting a New Chapter in My Health Journey

2 years - 5 months - and 1 day ago I made a decision to, in the famous words of almost all Biggest Loser Contestants, “Put me first.” After years of claiming to take care of myself, I finally actually did something about me. I woke up at 4:45 am and suited up in the an old college t-shirt, and the only pair of sweatpants and sneakers I owned. I then drove my tired behind to a darkened park n’ ride to endure what I assumed was my last hour of life. On the cool Monday morning was the day I met Shawn Chevalier, and those I now call my “HOF Family.” However, as you all many know, it didn’t stop after just that one day, or week, or month, I kept going back for more torture, because I just loved it. I loved the people, the trainers, the laughter, the tears, and the feeling of doing something good for me.

There is no doubt in my mind that had it not been for that day, which almost didn’t happen, I would not be who I am today. The truth is, I signed up for my first Hardbody Outdoor Fitness experience through a Groupon, but just like my old self, I put off sign up until it had actually expired. Though of course, Shawn being the trainer I know and love today, would not let that be my excuse and allowed me to join class that day anyway.

Fast forward to today, and I look at my list of all that has happened since in disbelief:

  • 11 – 5k Races
  • 1 – 10k Race
  • 1 – Duathlon Relay
  • 136 Day Running Streak
  • 30 lbs lost (this may not be much to some, but trust me it was a lot of work for me)
  • 4 dress sizes down
  • Too many pairs of sneakers to count
  • Started my own blog
  • Participated in a fitness calendar
  • Guest blogged as recipe contributor for the HOF Blog


And honestly, the list could go on more of smaller goals. It’s really incredible how that one day has changed my life’s direction so much. I owe all these changes to Shawn and the HOF Family, which is why this decision was even hard for me to make. After months of consideration, I have decided to stop attending HOF. As I have had the change to dive in to my health issues and it has become apparent that while this is a great way for many to exercise and get fit, it is just not right for me. At least it is not right for me, right now.

However, I know that through all the knowledge I have learned from Shawn, Nicole, Suzy, and all of the other amazing HOF members, I am more than prepared to do this on my own. Through this experience I have gain the confidence I needed to keep moving forward, to wake up at the zero-dark-thirty and get it in, and to know what it means to finish strong.

Now is my time, to really take charge and crack the code on Alex, and how to work with what I have been given to me. I am going to find out what is really means to be a Genetic Mutant (dubbed by my Naturopath). This is definitely the beginning of a new chapter, and I can’t wait to see where it takes me. However, I will never forget how important this last chapter has been in my life story. You will definitely be seeing many changes from me in the next months, and I can’t wait to share those with all of you. To all those how have been a part of the journey both in person and virtual, I am forever grateful.

Wednesday, February 4, 2015

Smoked Salmon, Spinach, and Artichoke Dip (AIP, Paleo)


Cheese is one of the things I have missd the most since going Paleo/AIP. If only cheese agreed with me. I am sure in small doses it would be fine, but I have very little self control when it comes to it.

The day the genius Hayley Stobbs, from I Eat Real Food, introduced her Zucchini Cheese it was a total game changer to the paleo world. Soon there were so many amazing variations and adaptations to this genius recipe and we all had cheese alternative again to use!

This recipe combines the original zucchini cheese recipe with a adapted cauli-cheese sauce by the equally talented Martine Partridge from Eat Heal Thrive. This guilt-free, dairy-free, nut-free, egg-free, and soy-free dip is perfect for any party.


Smoked Salmon, Spinach and Artichoke Dip


Ingredients


Preparations

  1. Follow the instructions for both the Cauli-Cheese Sauce and Zucchini Cheese as originally outlined. These can both be made in advance.
  2. Warm a large pot on medium heat. Slowly begin to melt the zucchini cheese (if made previously), then add in the Cauli-Cheese Sauce.
  3. Once sauces are combined, add in remaining ingredients. 
  4. Stir frequently and heat until spinach is fully warmed, about 10-12 minutes.
  5. Serve immediately with cut veggies and/or plantain chips. Store leftovers in fridge using an airtight container. Simply reheat in microwave.


Friday, January 30, 2015

Oven Baked Plantain Chips (AIP, Paleo, Vegan)


Prior to starting AIP, I could easily eat entire bag of Trader Joe's Plantain chips in one sitting. However, since they cooked with sunflower oil they are a no-no for me right now, so I had to find a way to feed my addiction. Plus, I am always looking for an excuse to use my mandolin.

These are super yummy and perfect to add a little crunch to any snack.

Oven Baked Plantain Chips


Ingredients

  • 2-3 green plantains
  • 2 tablespoons of avocado oil
  • Sea salt
  • Garlic powder

Instructions

  1. Preheat oven to 400 degrees.
  2. Cut off ends and peel plantains. Using a mandolin or very sharp knife slice plantains as thin as a possible.
  3. Line two cooking sheets with parchment paper. Light brush the the parchment paper with oil.
  4. In a single layer, lay out plantain slices on the cooking sheet and brush the top with a little more oil.
  5. Cook slices for 15 mins, flip and cook for an additional 10-15 minutes. Keep an eye on the slices as they burn quickly. Remove them as they start to brown.
  6. Place chips in a bowl and season with sea salt and garlic powder to taste.
  7. Enjoy!